一 关于SQL Server
SQL Server数据库是Microsoft开发设计的一个关系数据库智能管理系统(RDBMS)。

二 安装部署

2.1 安装依赖 Python3
wget https://www.python.org/ftp/python/3.6.6/Python-3.6.6.tar.xz
tar -xvf Python-3.6.6.tar.xz
cd Python-3.6.6
./configure --prefix=/home/app/Python-3.6.6
make && make install
ln -s /home/app/Python-3.6.6/bin/python3.6 /usr/bin/python3
2.2 安装mssql-server-2019
2.2.1 安装mssql-server
wget -O /etc/yum.repos.d/mssql-server.repo https://packages.microsoft.com/config/rhel/7/mssql-server-2019.repo
yum install -y mssql-server
2.2.2 配置安装信息
在指定位置输入要安装的版本号和管理员账号SA的密码:
[root@test66 server2019]# /opt/mssql/bin/mssql-conf setup
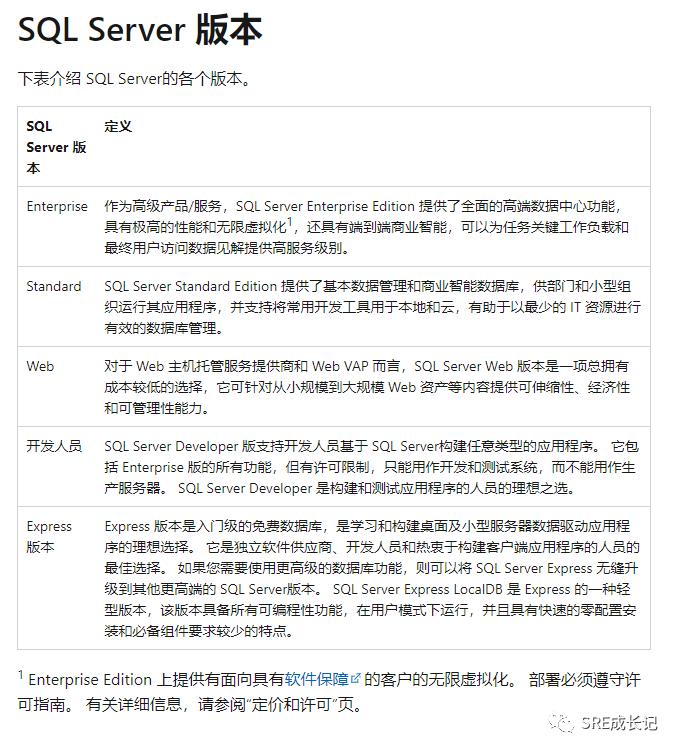
Choose an edition of SQL Server:   #仔细阅读每个版本的说明,选择适合自己的而版本,这里选择安装 3)Express (free)
  1) Evaluation (free, no production use rights, 180-day limit)
  2) Developer (free, no production use rights)
  3) Express (free)
  4) Web (PAID)
  5) Standard (PAID)
  6) Enterprise (PAID) - CPU Core utilization restricted to 20 physical/40 hyperthreaded
  7) Enterprise Core (PAID) - CPU Core utilization up to Operating System Maximum
  8) I bought a license through a retail sales channel and have a product key to enter.


Details about editions can be found at
https://go.microsoft.com/fwlink/?LinkId=2109348&clcid=0x409


Use of PAID editions of this software requires separate licensing through a
Microsoft Volume Licensing program.
By choosing a PAID edition, you are verifying that you have the appropriate
number of licenses in place to install and run this software.

Enter your edition(1-8): 3  ##输入上边自己要安装的版本对应的数字
The license terms for this product can be found in
/usr/share/doc/mssql-server or downloaded from:
https://go.microsoft.com/fwlink/?LinkId=2104294&clcid=0x409


The privacy statement can be viewed at:
https://go.microsoft.com/fwlink/?LinkId=853010&clcid=0x409


Enter the SQL Server system administrator password:   #输入管理员账号SA的密码,密码长度八位以上,且密码必须包含数字、字母和特殊字符
Confirm the SQL Server system administrator password:   #确认密码
Configuring SQL Server...


The licensing PID was successfully processed. The new edition is [Express Edition].
ForceFlush is enabled for this instance.
ForceFlush feature is enabled for log durability.
Setup has completed successfully. SQL Server is now starting.
2.2.3 检查启动状态:
systemctl status mssql-server
查看启动端口

三 安装命令行工具
3.1 卸载服务器上老版本unixODBC-utf16-devel (如有)
yum remove unixODBC-utf16 unixODBC-utf16-devel
3.2 安装unixODBC-devel
wget -O /etc/yum.repos.d/msprod.repo https://packages.microsoft.com/config/rhel/7/prod.repo
yum安装,两处交互信息都输入YES
[root@test66 tools]# yum install -y mssql-tools unixODBC-devel
.......  #省略若干行
Warning: RPMDB altered outside of yum.
  Installing : unixODBC-2.3.7-1.rh.x86_64                                                                       1/4
The license terms for this product can be downloaded from
https://aka.ms/odbc17eula and found in
/usr/share/doc/msodbcsql17/LICENSE.txt . By entering 'YES',
you indicate that you accept the license terms.

Do you accept the license terms? (Enter YES or NO)
YES  #输入YES
  Installing : msodbcsql17-17.9.1.1-1.x86_64                                                                    2/4
The license terms for this product can be downloaded from
http://go.microsoft.com/fwlink/?LinkId=746949 and found in
/usr/share/doc/mssql-tools/LICENSE.txt . By entering 'YES',
you indicate that you accept the license terms.

Do you accept the license terms? (Enter YES or NO)
YES   #输入YES
  Installing : mssql-tools-17.9.1.1-1.x86_64                                                                    3/4
  Installing : unixODBC-devel-2.3.7-1.rh.x86_64                                                                 4/4
  Verifying  : unixODBC-2.3.7-1.rh.x86_64                                                                       1/4
  Verifying  : unixODBC-devel-2.3.7-1.rh.x86_64                                                                 2/4
  Verifying  : msodbcsql17-17.9.1.1-1.x86_64                                                                    3/4
  Verifying  : mssql-tools-17.9.1.1-1.x86_64                                                                    4/4

Installed:
  mssql-tools.x86_64 0:17.9.1.1-1                         unixODBC-devel.x86_64 0:2.3.7-1.rh

Dependency Installed:
  msodbcsql17.x86_64 0:17.9.1.1-1                            unixODBC.x86_64 0:2.3.7-1.rh
3.3 设置环境变量
echo "export PATH=$PATH:/opt/mssql-tools/bin" >> /etc/profile
source  /etc/profile
四 验证数据库
4.1 登录数据库
[root@test66 tools]# sqlcmd -S localhost -U SA -p
Password:
1>

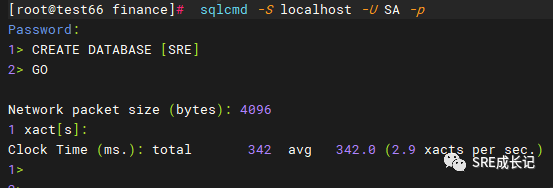
4.2 创建测试库
1> CREATE DATABASE [SRE]
2> GO

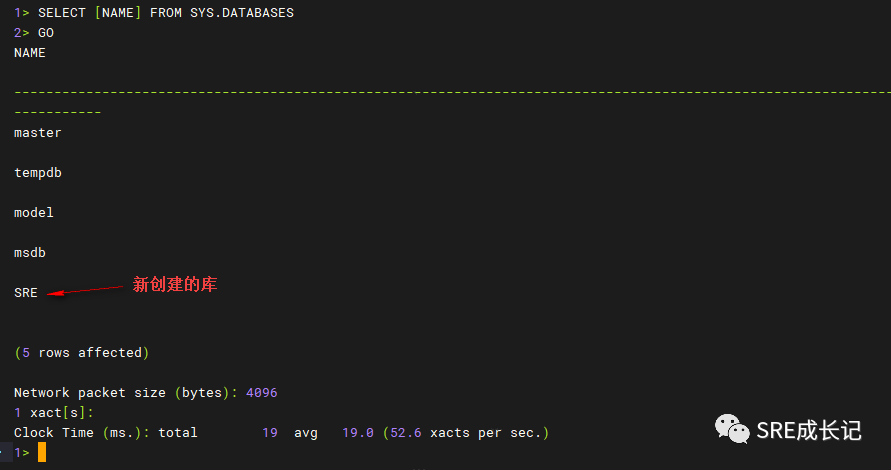
4.3 查看所有database
1> SELECT [NAME] FROM SYS.DATABASES
2> GO

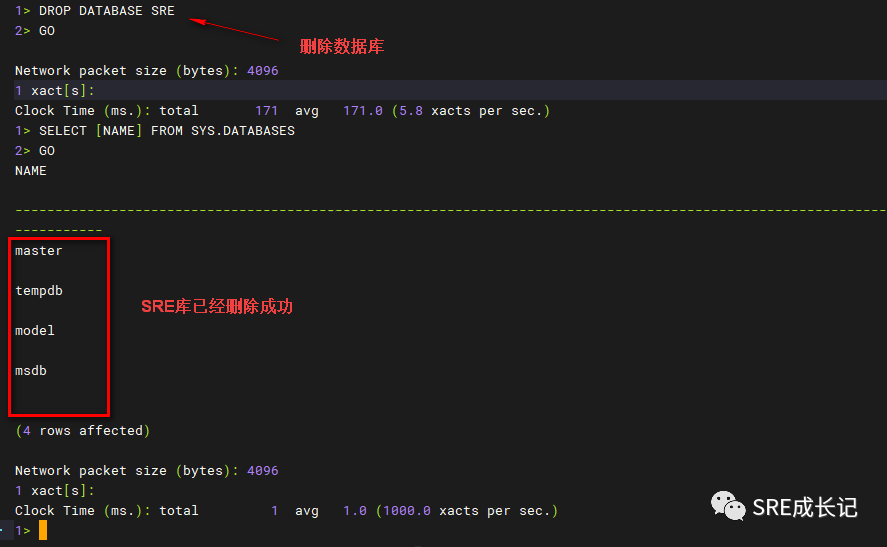
4.4 删除数据库
1> DROP DATABASE SRE
2> GO

到此这篇关于centos7部署SqlServer2019的实现步骤的文章就介绍到这了,更多相关centos7部署SqlServer2019内容请搜索IT俱乐部以前的文章或继续浏览下面的相关文章希望大家以后多多支持IT俱乐部!

