需求
接到一个任务,把一个数据库里面的数据定时导入到另外的数据库中
但是又不允许我们通过binlog+canal同步,所以考虑起一个微服务充当同步脚本的作用
且配置多数据库,并且支持随时切换
环境
- 1、mysql多个库
- 2、mysql+postgresql
思路
spring框架本身支持多数据源,我们查看他的定义
Spring的多数据源支持—AbstractRoutingDataSource,AbstractRoutingDataSource定义了抽象的determineCurrentLookupKey方法,子类实现此方法,来确定要使用的数据源
看下下面它的源码:
1 2 3 4 5 6 7 8 9 10 11 12 13 14 15 16 17 | public abstract class AbstractRoutingDataSource extends AbstractDataSource implements InitializingBean { protected DataSource determineTargetDataSource() { Assert.notNull(this.resolvedDataSources, "DataSource router not initialized"); Object lookupKey = determineCurrentLookupKey(); DataSource dataSource = this.resolvedDataSources.get(lookupKey); if (dataSource == null && (this.lenientFallback || lookupKey == null)) { dataSource = this.resolvedDefaultDataSource; } if (dataSource == null) { throw new IllegalStateException("Cannot determine target DataSource for lookup key [" + lookupKey + "]"); } return dataSource; } // 确定当前要使用的数据源 protected abstract Object determineCurrentLookupKey();} |
所以我们只要写一个自定义类去继承上面这个AbstractRoutingDataSource类,并重写determineCurrentLookupKey 方法即可
操作
包如下:
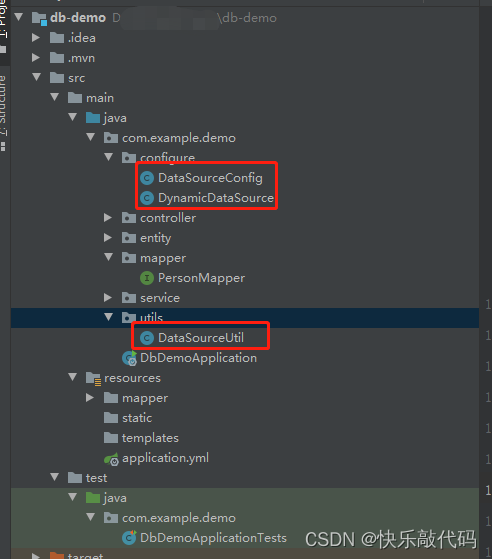
一、多个库都是mysql类型
pom依赖
1 | 4.0.0org.springframework.bootspring-boot-starter-parent2.6.7com.exampledb-demo0.0.1-SNAPSHOTdb-demoDemo project for Spring Boot1.8org.springframework.bootspring-boot-starter-weborg.springframework.bootspring-boot-starter-jdbcorg.mybatis.spring.bootmybatis-spring-boot-starter2.2.2mysqlmysql-connector-javaruntimeorg.springframework.bootspring-boot-starter-testtestorg.springframework.bootspring-boot-maven-plugin |
1、配置文件application.yml
1 2 3 4 5 6 7 8 9 10 11 12 13 14 15 16 17 18 19 20 21 22 | #端口server.port: 7788spring.application.name: bddemo# mysqlspring.datasource: driver-class-name: com.mysql.cj.jdbc.Driver #数据库1 db1: jdbc-url: jdbc:mysql://127.0.0.1:3306/db1?serverTimezone=GMT%2B8&useUnicode=true&characterEncoding=utf8&useSSL=false username: root password: 123456 #数据库2 db2: jdbc-url: jdbc:mysql://127.0.0.1:3306/db2?serverTimezone=GMT%2B8&useUnicode=true&characterEncoding=utf8&useSSL=false username: root password: 123456# mybatismybatis: mapper-locations: classpath:mapper/*Mapper.xml type-aliases-package: ccom.example.demo.*.entity |
2、配置类
1) DataSourceConfig 数据库配置类:
1 2 3 4 5 6 7 8 9 10 11 12 13 14 15 16 17 18 19 20 21 22 23 24 25 26 27 28 29 30 31 32 33 34 35 36 37 38 39 40 41 42 43 44 45 46 47 48 49 50 51 52 53 54 55 56 57 58 59 60 61 62 63 64 65 66 67 68 69 70 | import org.springframework.boot.context.properties.ConfigurationProperties;import org.springframework.boot.jdbc.DataSourceBuilder;import org.springframework.context.annotation.Bean;import org.springframework.context.annotation.Configuration;import org.springframework.context.annotation.Primary;import org.springframework.jdbc.datasource.DataSourceTransactionManager;import org.springframework.transaction.PlatformTransactionManager;import javax.sql.DataSource;import java.util.HashMap;import java.util.Map;/*** 数据库配置* @date 2022/5/19*/@Configurationpublic class DataSourceConfig { /** * 数据源1 * spring.datasource.db1:application.properteis中对应属性的前缀 * @return */ @Bean(name = "db1") @ConfigurationProperties(prefix = "spring.datasource.db1") public DataSource dataSourceOne() { return DataSourceBuilder.create().build(); } /** * 数据源2 * spring.datasource.db2:application.properteis中对应属性的前缀 * @return */ @Bean(name = "db2") @ConfigurationProperties(prefix = "spring.datasource.db2") public DataSource dataSourceTwo() { return DataSourceBuilder.create().build(); } /** * 动态数据源: 通过AOP在不同数据源之间动态切换 * @return */ @Primary @Bean(name = "dynamicDataSource") public DataSource dynamicDataSource() { DynamicDataSource dynamicDataSource = new DynamicDataSource(); // 默认数据源 dynamicDataSource.setDefaultTargetDataSource(dataSourceOne()); // 配置多数据源 Map<object data-origwidth="" data-origheight="" style="width: 1264px;"> dsMap = new HashMap(); dsMap.put("db1", dataSourceOne()); dsMap.put("db2", dataSourceTwo()); dynamicDataSource.setTargetDataSources(dsMap); return dynamicDataSource; } /** * 配置多数据源后IOC中存在多个数据源了,事务管理器需要重新配置,不然器不知道选择哪个数据源 * 事务管理器此时管理的数据源将是动态数据源dynamicDataSource * 配置@Transactional注解 * @return */ @Bean public PlatformTransactionManager transactionManager() { return new DataSourceTransactionManager(dynamicDataSource()); }}</object> |
2) DynamicDataSource 动态数据源类:
1 2 3 4 5 6 7 8 9 10 11 12 | import com.example.demo.utils.DataSourceUtil;import org.springframework.jdbc.datasource.lookup.AbstractRoutingDataSource;/** * 动态数据源类 * @date 2022/2/11 */public class DynamicDataSource extends AbstractRoutingDataSource { @Override protected Object determineCurrentLookupKey() { return DataSourceUtil.getDB(); }} |
3、切换工具类:DataSourceUtil
1 2 3 4 5 6 7 8 9 10 11 12 13 14 15 16 17 18 19 20 21 22 23 24 25 26 27 28 29 30 31 32 33 34 35 36 37 38 | /*** 数据源切换工具 * @date 2022/5/19*/public class DataSourceUtil { /** * 默认数据源 */ public static final String DEFAULT_DS = "db1"; /** * 数据源属于一个公共的资源 * 采用ThreadLocal可以保证在多线程情况下线程隔离 */ private static final ThreadLocal contextHolder = new ThreadLocal(); /** * 设置数据源名 * @param dbType */ public static void setDB(String dbType) { contextHolder.set(dbType); } /** * 获取数据源名 * @return */ public static String getDB() { return (contextHolder.get()); } /** * 清除数据源名 */ public static void clearDB() { contextHolder.remove(); }} |
4、启动
(1)启动类中配置移除默认的数据库配置类
1 2 3 4 5 6 7 8 9 10 11 12 13 | import org.springframework.boot.SpringApplication;import org.springframework.boot.autoconfigure.SpringBootApplication;import org.springframework.boot.autoconfigure.jdbc.DataSourceAutoConfiguration;//移除默认数据库配置类@SpringBootApplication(exclude = {DataSourceAutoConfiguration.class})public class DbDemoApplication { public static void main(String[] args) { SpringApplication.run(DbDemoApplication.class, args); }} |
(2)测试
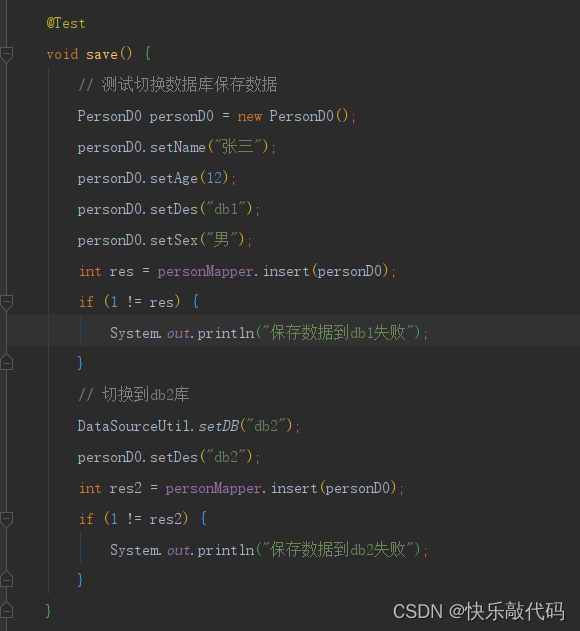
结果
- db1库

- db2库

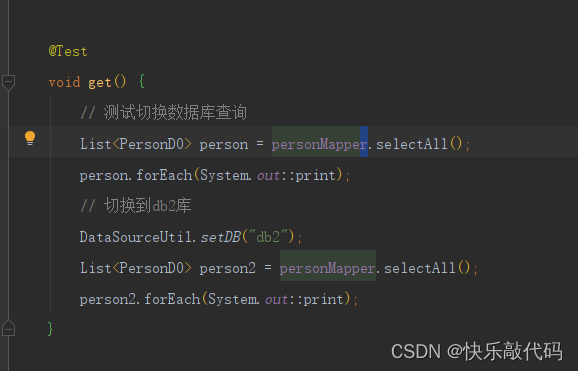

二、一个是mysql一个是postgresql
1、pom依赖新增
1 | org.postgresqlpostgresqlruntime |
2、配置文件application.yml
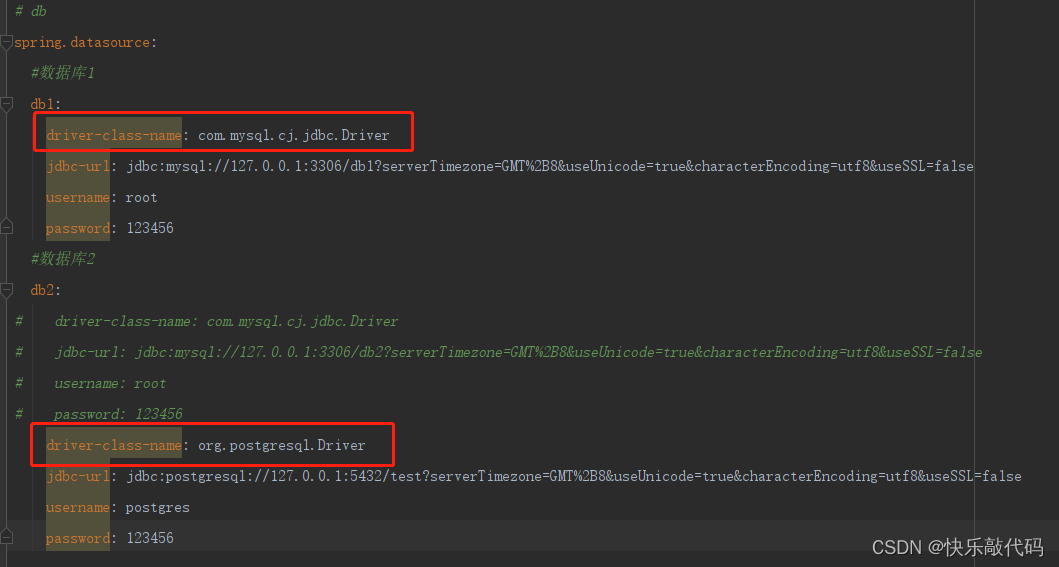
1 2 3 4 5 6 7 8 9 10 11 12 13 14 15 16 17 18 19 20 21 22 23 24 25 26 27 | #端口server.port: 7788spring.application.name: bddemo# mysqlspring.datasource: #数据库1 db1: driver-class-name: com.mysql.cj.jdbc.Driver jdbc-url: jdbc:mysql://127.0.0.1:3306/db1?serverTimezone=GMT%2B8&useUnicode=true&characterEncoding=utf8&useSSL=false username: root password: 123456 #数据库2 db2:# driver-class-name: com.mysql.cj.jdbc.Driver# jdbc-url: jdbc:mysql://127.0.0.1:3306/db2?serverTimezone=GMT%2B8&useUnicode=true&characterEncoding=utf8&useSSL=false# username: root# password: 123456 driver-class-name: org.postgresql.Driver jdbc-url: jdbc:postgresql://127.0.0.1:5432/test?serverTimezone=GMT%2B8&useUnicode=true&characterEncoding=utf8&useSSL=false username: postgres password: 123456# mybatismybatis: mapper-locations: classpath:mapper/*Mapper.xml type-aliases-package: ccom.example.demo.*.entity |
注意:
之前都是mysql的库,所以驱动在上面
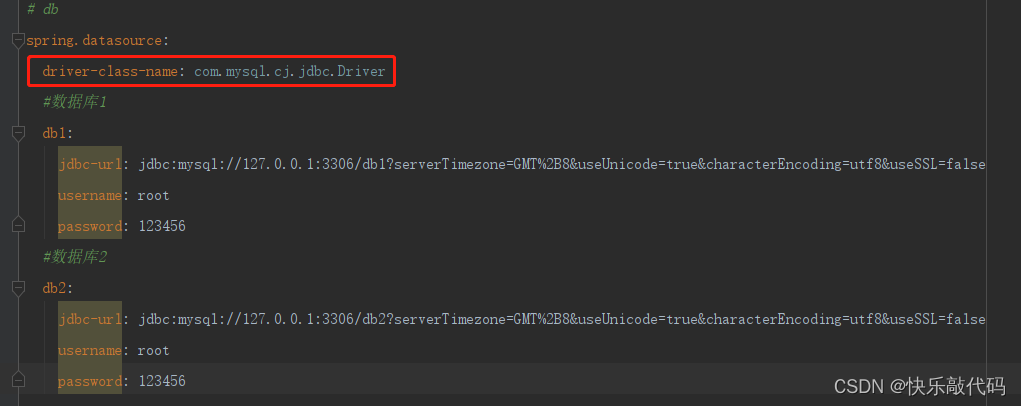
现在因为数据库的产品不一样,所以驱动类名称放在下面单独配置(有些人真完全不会变通,哎)
3、测试
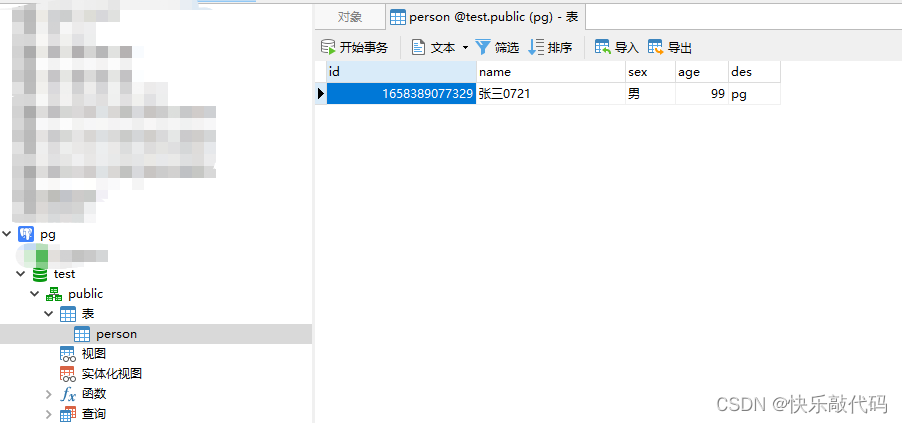
插入:pg数据库的主键自增mybatis还有点难搞,我们直接配置id插入
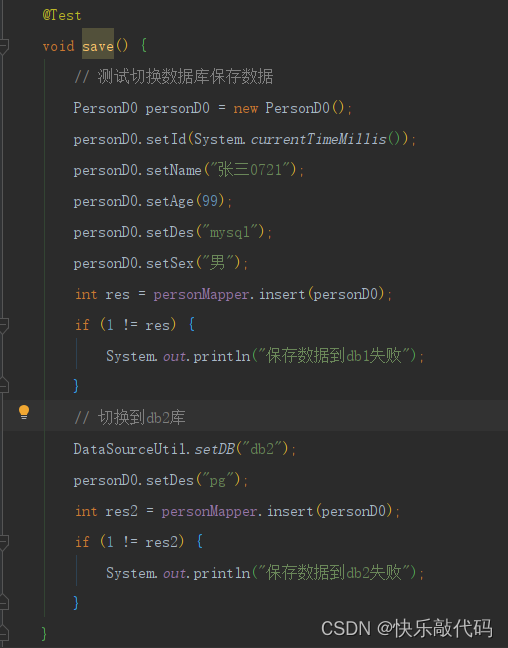
- mysql:

- pg:
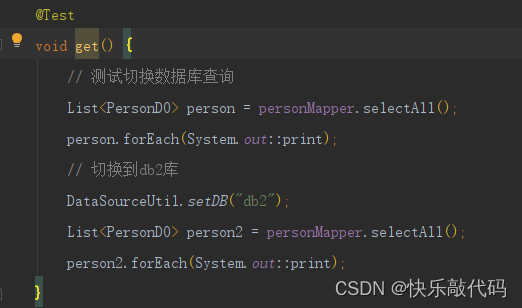
- 查询:

总结
以上为个人经验,希望能给大家一个参考,也希望大家多多支持IT俱乐部。

