
一、简介
WebSocket通过一个TCP连接在客户端和服务器之间建立一个全双工、双向的通信通道,使得客户端和服务器之间的数据交换变得更加简单,允许服务端主动向客户端推送数据,在WebSocket的API中,浏览器和服务器只需要完成一次握手,两者之间就直接可以创建持久性的连接,并进行双向数据传输。
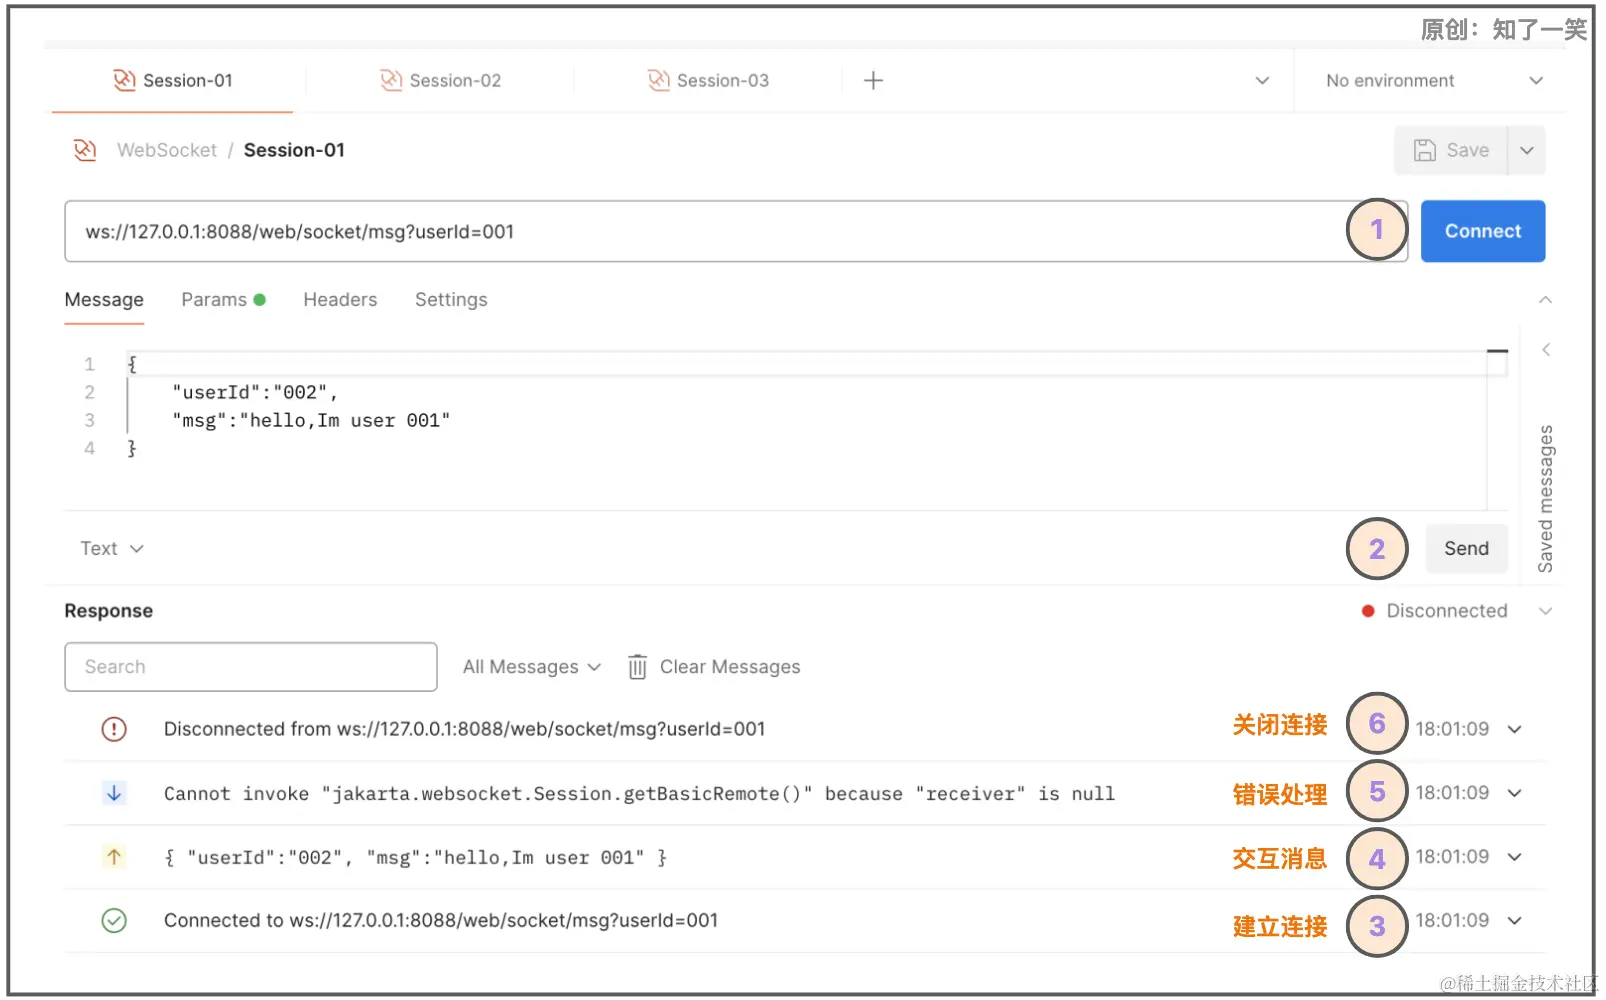
【基于Postman工具的WebSocket交互】
1 2 3 4 5 6 7 8 9 10 11 12 13 14 15 16 17 18 19 20 | Connected to ws://127.0.0.1:8088/web/socket/msgHandshake DetailsRequest URL: http://127.0.0.1:8088/web/socket/msgRequest Method: GETStatus Code: 101 Request HeadersSec-WebSocket-Version: 13Sec-WebSocket-Key: 5Qrs8JeRLsiY9G/PRJUocQ==Connection: UpgradeUpgrade: websocketSec-WebSocket-Extensions: permessage-deflate; client_max_window_bitsHost: 127.0.0.1:8088Response HeadersUpgrade: websocketConnection: upgradeSec-WebSocket-Accept: E3aFw2bBzxByPCynmQ7lZ+7BgsU=Sec-WebSocket-Extensions: permessage-deflate;client_max_window_bits=15 |
二、工程搭建
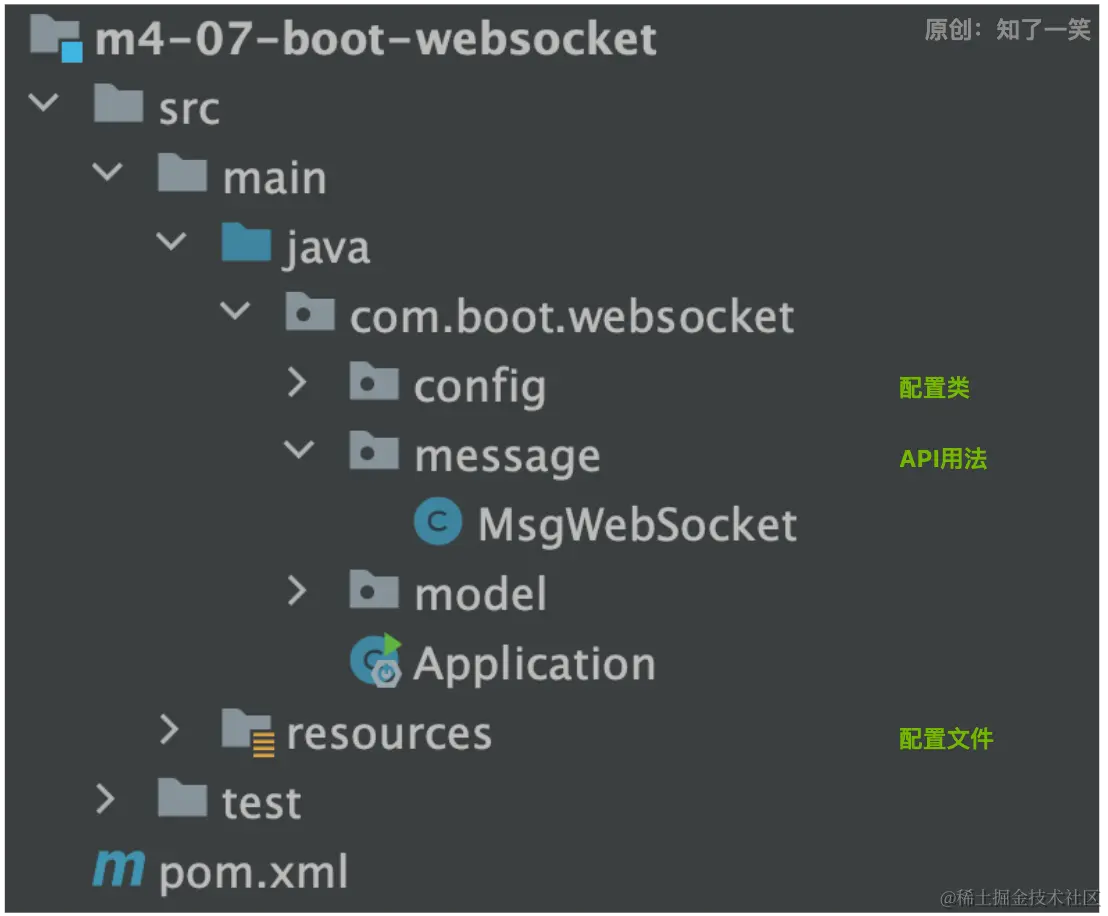
1、工程结构
2、依赖管理
在starter-websocket的依赖中,涉及到spring框架中两个关系较为密切的组件,分别是websocket和messaging组件。
1 | org.springframework.bootspring-boot-starter-websocket${spring-boot.version} |
三、WebSocket用法
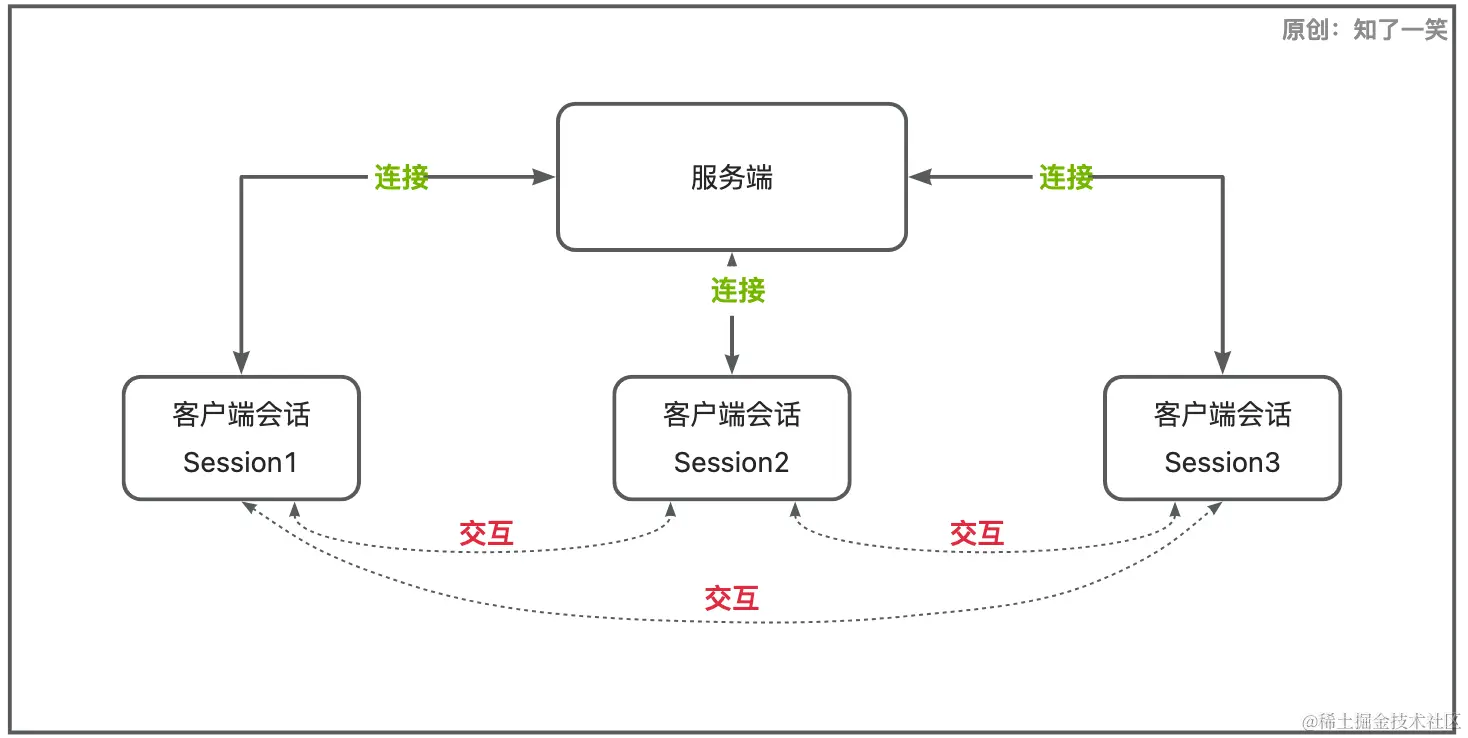
1、示意图
在下面的案例中,大致模拟这样一个流程,三个客户端分别和服务端建立连接,然后进行客户端之间的会话通信。
2、API参考
这里通过4个核心的方法注解,分别处理会话的不同动作,比如连接的建立和关闭,通信交互和错误处理;在实际的应用场景中,需要在通信方法中设计更多的指令来应对不同的业务场景。
1 2 3 4 5 6 7 8 9 10 11 12 13 14 15 16 17 18 19 20 21 22 23 24 25 26 27 28 29 30 31 32 33 34 35 36 37 38 39 40 41 42 43 44 45 46 47 48 49 50 51 52 53 54 | @ServerEndpoint("/web/socket/msg")public class MsgWebSocket { private static final ConcurrentHashMap sessions = new ConcurrentHashMap(); private static final AtomicInteger onlineCount = new AtomicInteger(0); /** * 建立连接调用的方法 */ @OnOpen public void onOpen(Session session) { String userId = session.getRequestParameterMap().get("userId").get(0); // 加入Set中 sessions.put(userId,session); // 在线数增加 onlineCount.getAndIncrement(); log.info("session-{},online-count-{}",session.getId(),onlineCount.get()); } /** * 客户端消息处理的方法 */ @OnMessage public void sendMsg(Session sender,String message) throws Exception { MsgDTO dto = JSONUtil.toBean(message, MsgDTO.class); Session receiver = sessions.get(dto.getUserId()); if (receiver != null) { receiver.getBasicRemote().sendText(dto.getMsg()); } } /** * 关闭连接调用的方法 */ @OnClose public void onClose(Session session) { String userId = session.getRequestParameterMap().get("userId").get(0); // 从Set中删除 sessions.remove(userId); // 在线数减少 onlineCount.getAndDecrement(); log.info("session-{},down-line-count-{}",session.getId(),onlineCount.get()); } /** * 发生错误调用的方法 */ @OnError public void onError(Session session, Throwable throwable) throws Exception { log.error("Web Stock Error", throwable); session.getBasicRemote().sendText(throwable.getMessage()); }} |
测试效果图:注意这里使用的是postman最新版本。
四、总结
到此这篇关于SpringBoot3集成WebSocket的全过程的文章就介绍到这了,更多相关SpringBoot3集成WebSocket内容请搜索IT俱乐部以前的文章或继续浏览下面的相关文章希望大家以后多多支持IT俱乐部!

