
技术栈介绍
-
Spring Boot:一个基于Spring框架的开源项目,用于简化Spring应用的初始搭建以及开发过程。它通过提供默认配置减少开发中的配置工作,使得开发者能够快速启动和部署Spring应用。
-
Vue.js:一个渐进式JavaScript框架,用于构建用户界面。Vue的核心库只关注视图层,易于上手,同时也能够配合其他库或现有项目使用。Vue.js以其轻量级、高效性和灵活性而广受欢迎。
后端实现
后端使用Spring Boot框架,通过@RestController注解定义一个控制器UploadController,提供/upload端点处理文件上传请求。代码中使用了MultipartFile来接收上传的文件,并将其保存到服务器的指定目录。
添加依赖
1 | org.springframework.bootspring-boot-starter-web |
代码注释
1 2 3 4 5 6 7 8 9 10 11 12 13 14 15 16 17 18 19 20 21 22 23 24 25 26 27 | @RestControllerpublic class UploadController { @Operation(summary = "上传图片到本地") @PostMapping("/upload") public String upload(MultipartFile file) { if (file.isEmpty()) { return "图片为空"; } String originalFilename = file.getOriginalFilename(); String fileNamePrefix = new SimpleDateFormat("yyyyMMddHHmmssSSS").format(new Date()); assert originalFilename != null; String fileNameSuffix = "." + originalFilename.split("\.")[1]; String fileName = fileNamePrefix + fileNameSuffix; ApplicationHome applicationHome = new ApplicationHome(this.getClass()); //String pre = applicationHome.getDir().getParentFile().getParentFile().getAbsolutePath() + "\src\main\resources\static\images\"; String pre = applicationHome.getDir().getParentFile().getParentFile().getParentFile().getAbsolutePath() + "\spring-ui\src\assets\avatar\"; String path = pre + fileName; try { file.transferTo(new File(path)); String replace = path.replace(applicationHome.getDir().getParentFile().getParentFile().getParentFile().getAbsolutePath() + "\spring-ui\src", "/src"); return replace.replace("\", "/"); } catch (IOException e) { e.printStackTrace(); } return "图片上传失败"; }} |
前端实现
前端使用Vue.js框架,通过封装axios请求和全局配置,实现与后端的通信。同时,使用Vite作为构建工具,配置代理解决跨域问题。
代码注释
全局配置封装
1 2 3 4 | // config/index.tsexport const baseURL = '/api'; // 基础URLexport const timeout = 10000; // 请求超时时间export const headers = { 'X-Custom-Header': 'foobar' }; // 自定义请求头 |
Axios二次封装
1 2 3 4 5 6 7 8 9 10 11 12 13 14 15 | // request/index.tsconst request = axios.create({ // 配置axios实例 baseURL, timeout, headers});// 添加请求和响应拦截器request.interceptors.request.use((config) => { // 请求拦截器逻辑 return config;}, (error) => { // 响应拦截器逻辑 return Promise.reject(error);}); |
Api接口请求
1 2 3 4 5 6 7 8 9 10 | //api/index.tsimport * as common from '@/api/common'import * as user from '@/api/user'const api = { common, user,}export default api; |
1 2 3 4 5 6 7 8 9 10 11 12 13 14 | //api/common.tsimport request from "@/request";// 响应接口export interface UploadRes {}/** * 上传图片到本地 * @param {string} file * @returns */export function upload(file: object): Promise { return request.post(`/upload`, file);} |
1 2 3 4 5 6 7 8 9 10 11 12 13 14 15 16 17 18 19 20 21 22 23 24 25 26 27 28 29 30 31 32 33 34 35 36 37 38 39 40 41 42 43 44 45 46 47 48 49 50 51 52 53 54 55 56 57 | //api/user.tsimport request from "@/request";// 参数接口export interface UpdateUserParams { id?: number; name?: string; sex?: string; age?: number; pic?: string; acc?: string; pwd?: string; phone?: string; email?: string; dept?: string; post?: string; status?: string; createBy?: string; createTime?: string | unknown; updateBy?: string; updateTime?: string | unknown; remark?: string;}// 响应接口export interface UpdateUserRes { message: string; success: boolean; code: number; data: Record;}/** * 修改-账号 * @param {object} params $!{table.comment} * @param {number} params.id * @param {string} params.name 姓名 * @param {string} params.sex 性别 * @param {number} params.age 年龄 * @param {string} params.pic 头像 * @param {string} params.acc 账号 * @param {string} params.pwd 密码 * @param {string} params.phone 电话号码 * @param {string} params.email 电子邮件 * @param {string} params.dept 用户部门 * @param {string} params.post 用户岗位 * @param {string} params.status 状态(0正常 1停用) * @param {string} params.createBy 创建者 * @param {object} params.createTime 创建时间 * @param {string} params.updateBy 更新者 * @param {object} params.updateTime 更新时间 * @param {string} params.remark 备注 * @returns */export function updateUser(params: UpdateUserParams): Promise { return request.post(`/userEntity/update`, params);} |
解决CORS跨域问题
1 2 3 4 5 6 7 8 9 10 11 12 | // vite.config.tsexport default defineConfig({ server: { proxy: { "/api": { changeOrigin: true, // 是否改变源 rewrite: (path) => path.replace(//api/, ""), // 重写路径 }, }, },}); |
业务处理代码
1 2 3 4 5 6 7 8 9 10 11 12 13 14 15 16 17 18 19 20 21 22 23 24 25 26 27 28 29 30 31 32 33 34 35 36 37 38 39 40 41 42 43 44 45 46 47 48 49 | <div class="el-upload__text"> <em> 点击 </em> 或<em> 拖动文件 </em>上传 </div> <div class="el-upload__tip"> 仅支持 jpg/png 格式文件大小小于 2MB </div> import { ref } from "vue";import api from "@/api";// 响应式引用,用于存储用户信息const user = ref({});// 生命周期钩子,初始化时获取用户信息onMounted(() => { user.value = JSON.parse(localStorage.getItem("user"));});// 处理文件变化,上传文件并更新用户信息//修改头像const handleChanges = (file) => { if (file.raw.type !== 'image/png') {//限制文件类型 ElMessage.error({message: "只能上传png格式的文件", grouping: true, showClose: true}); return false; } if (file.raw.size / 1024 / 1024 > 5) { ElMessage.error('文件大于 5MB!') return false; } const param = new FormData(); param.append('file', file.raw); api.common.upload(param).then((res: any) => { if (res !== null) ElMessage.success("上传成功"); if (res === null) ElMessage.error("上传失败"); api.user.updateUser({id: user.value.id, pic: res}).then((res: any) => { api.user.selectUserByAcc(user.value.acc).then((res: any) => { //更新缓存 localStorage.setItem("user", JSON.stringify(res.data)); //更新左侧描述列表 user.value = res.data; }) }) })};:deep(.el-descriptions__label) { min-width: 60px !important;} |
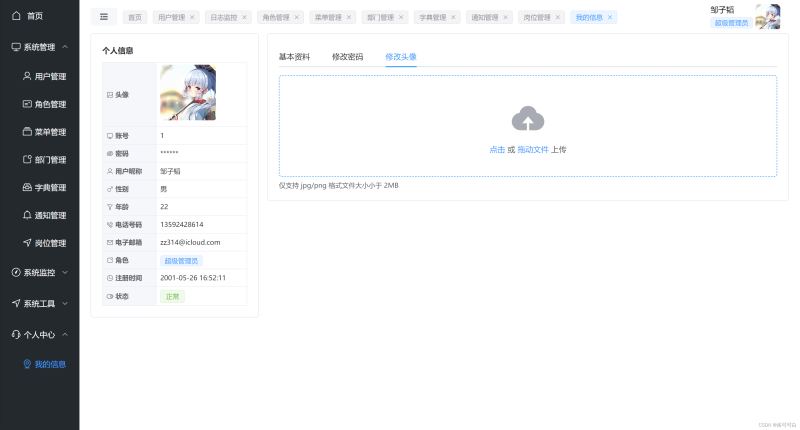
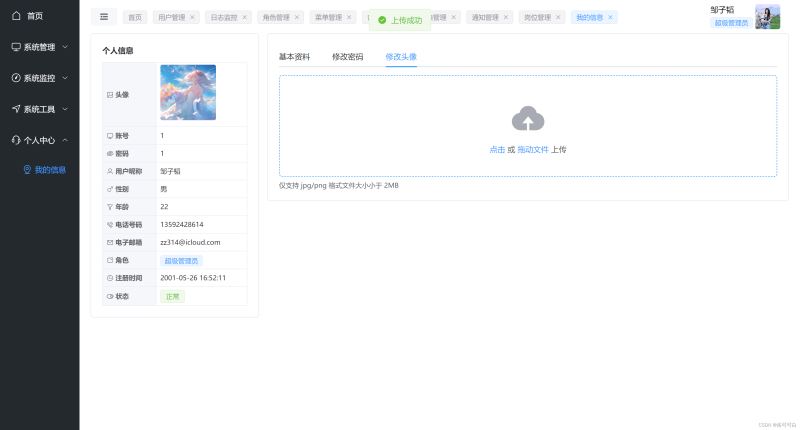
功能演示
在文章的最后,我们将展示上传头像功能的完整流程,包括前端的上传界面、后端的文件保存逻辑,以及成功上传后的头像回显效果。
结语
通过本文的介绍,我们学习了如何使用Spring Boot和Vue.js实现一个完整的头像上传与回显功能。这种前后端分离的开发模式不仅提高了开发效率,也使得系统更加模块化和易于维护。随着技术的不断进步,我们期待未来能够有更多类似的协同工作解决方案出现,以满足不同场景下的开发需求。
以上就是基于SpringBoot和Vue实现头像上传与回显功能的详细内容,更多关于SpringBoot Vue头像上传与回显的资料请关注IT俱乐部其它相关文章!

