
一、前言
Disruptor是一个开源的Java框架,它被设计用于在生产者-消费者问题上获得尽量高的吞吐量和尽量低的延迟,从功能上来看Disruptor是实现了队列的功能,而且是一个有界队列。那么它的应用场景自然就是“生产者-消费者”模型的应用场合了。Disruptor 是在内存中以队列的方式去实现的,而且是无锁的。这也是 Disruptor 为什么高效的原因。
二、SpringBoot整合Disruptor
1.添加依赖
1 | com.lmaxdisruptor3.4.4org.projectlomboklombok |
2.创建消息体实体
1 2 3 4 5 6 7 8 9 10 11 12 13 14 15 | package com.example.aopdemo.disruptor;import lombok.Data;/** * @author qx * @date 2024/2/21 * @des 消息体 */@Datapublic class MessageModel { private String message;} |
3.创建事件工厂类
1 2 3 4 5 6 7 8 9 10 11 12 13 14 15 | package com.example.aopdemo.disruptor;import com.lmax.disruptor.EventFactory;/** * @author qx * @date 2024/2/21 * @des 事件工厂类 */public class MessageEventFactory implements EventFactory { @Override public MessageModel newInstance() { return new MessageModel(); }} |
4.创建消费者
1 2 3 4 5 6 7 8 9 10 11 12 13 14 15 16 17 | package com.example.aopdemo.disruptor;import com.lmax.disruptor.EventHandler;import lombok.extern.slf4j.Slf4j;/** * @author qx * @date 2024/2/21 * @des 消息消费者 */@Slf4jpublic class MessageEventHandler implements EventHandler { @Override public void onEvent(MessageModel messageModel, long sequence, boolean endOfBatch) { log.info("消费者获取消息:{}", messageModel); }} |
5.构造BeanManager
1 2 3 4 5 6 7 8 9 10 11 12 13 14 15 16 17 18 19 20 21 22 23 24 25 26 27 28 29 30 31 32 33 34 | package com.example.aopdemo.disruptor;import org.springframework.beans.BeansException;import org.springframework.context.ApplicationContext;import org.springframework.context.ApplicationContextAware;import org.springframework.stereotype.Component;/** * @author qx * @date 2024/2/21 * @des */@Componentpublic class BeanManager implements ApplicationContextAware { private static ApplicationContext applicationContext; @Override public void setApplicationContext(ApplicationContext applicationContext) throws BeansException { BeanManager.applicationContext = applicationContext; } public static ApplicationContext getApplicationContext() { return applicationContext; } public static Object getBean(String name) { return applicationContext.getBean(name); } public static T getBean(Class clazz) { return applicationContext.getBean(clazz); }} |
6.创建消息管理器
1 2 3 4 5 6 7 8 9 10 11 12 13 14 15 16 17 18 19 20 21 22 23 24 25 26 27 28 29 30 31 32 33 34 35 36 37 38 39 40 41 42 43 44 45 | package com.example.aopdemo.disruptor;import com.lmax.disruptor.BlockingWaitStrategy;import com.lmax.disruptor.RingBuffer;import com.lmax.disruptor.dsl.Disruptor;import com.lmax.disruptor.dsl.ProducerType;import org.springframework.context.annotation.Bean;import org.springframework.context.annotation.Configuration;import java.util.concurrent.ExecutorService;import java.util.concurrent.Executors;/** * @author qx * @date 2024/2/21 * @des 事件管理器 */@Configurationpublic class MessageManager { @Bean("messageModel") public RingBuffer messageModelRingBuffer() { // 定义线程池 ExecutorService executorService = Executors.newFixedThreadPool(2); // 指定事件工厂 MessageEventFactory factory = new MessageEventFactory(); // 指定ringbuffer字节大小,必须为2的N次方(能将求模运算转为位运算提高效率),否则将影响效率 int bufferSize = 1024 * 256; //单线程模式,获取额外的性能 Disruptor disruptor = new Disruptor(factory, bufferSize, executorService, ProducerType.SINGLE, new BlockingWaitStrategy()); //设置事件业务处理器---消费者 disruptor.handleEventsWith(new MessageEventHandler()); //启动disruptor线程 disruptor.start(); //获取ringbuffer环,用于接取生产者生产的事件 return disruptor.getRingBuffer(); }} |
7.创建生产者
1 2 3 4 5 6 7 8 9 10 11 12 13 14 15 16 17 18 19 20 21 22 23 24 25 26 27 28 29 30 31 32 33 34 35 36 37 38 | package com.example.aopdemo.disruptor;import com.lmax.disruptor.RingBuffer;import lombok.extern.slf4j.Slf4j;import org.springframework.beans.factory.annotation.Autowired;import org.springframework.stereotype.Service;/** * @author qx * @date 2024/2/21 * @des 生产者 */@Service@Slf4jpublic class DisruptorService { @Autowired private RingBuffer messageModelRingBuffer; public void sayMessage(String message) { // 获取下一个Event槽的下标 long sequence = messageModelRingBuffer.next(); try { // 填充数据 MessageModel messageModel = messageModelRingBuffer.get(sequence); messageModel.setMessage(message); log.info("往消息队列中添加消息:{}", messageModel); } catch (Exception e) { log.error("failed to add event to messageModelRingBuffer for : e = {},{}", e, e.getMessage()); } finally { //发布Event,激活观察者去消费,将sequence传递给改消费者 //注意最后的publish方法必须放在finally中以确保必须得到调用;如果某个请求的sequence未被提交将会堵塞后续的发布操作或者其他的producer messageModelRingBuffer.publish(sequence); } }} |
8.创建测试类
1 2 3 4 5 6 7 8 9 10 11 12 13 14 15 16 17 18 19 20 21 22 23 24 | package com.example.aopdemo.controller;import com.example.aopdemo.disruptor.DisruptorService;import org.springframework.beans.factory.annotation.Autowired;import org.springframework.web.bind.annotation.GetMapping;import org.springframework.web.bind.annotation.RestController;/** * @author qx * @date 2024/2/21 * @des Disruptor测试 */@RestControllerpublic class DisruptorController { @Autowired private DisruptorService disruptorService; @GetMapping("/disruptor") public String disruptorTest(String message) { disruptorService.sayMessage(message); return "发送消息成功"; }} |
9.测试
启动程序,在浏览器访问请求连接进行测试。
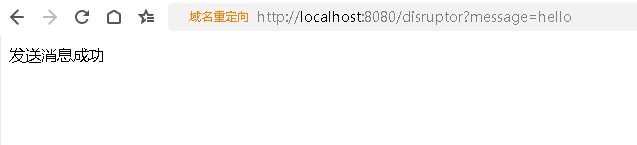
我们在控制台上可以获取到消息的发送和接收信息。
2024-02-21 15:22:16.059 INFO 6788 — [nio-8080-exec-1] c.e.aopdemo.disruptor.DisruptorService : 往消息队列中添加消息:MessageModel(message=hello)
2024-02-21 15:22:16.060 INFO 6788 — [pool-1-thread-1] c.e.a.disruptor.MessageEventHandler : 消费者获取消息:MessageModel(message=hello)
到此这篇关于SpringBoot基于Disruptor实现高效的消息队列 的文章就介绍到这了,更多相关SpringBoot Disruptor消息队列内容请搜索IT俱乐部以前的文章或继续浏览下面的相关文章希望大家以后多多支持IT俱乐部!

