
基于java实现文件树下载,供大家参考,具体内容如下
0.项目准备工作
1.前端用到的插件库:
ztree官网

2.后端maven依赖:
1 2 3 | <dependencies><dependency><groupid>javax.servlet</groupid><artifactid>javax.servlet-api</artifactid><version>3.1.0</version><scope>provided</scope></dependency><dependency><groupid>org.springframework</groupid><artifactid>spring-webmvc</artifactid><version>5.2.6.RELEASE</version></dependency><dependency><groupid>commons-io</groupid><artifactid>commons-io</artifactid><version>2.8.0</version></dependency><dependency><groupid>commons-fileupload</groupid><artifactid>commons-fileupload</artifactid><version>1.3.3</version></dependency> // gson可以不要,这是我测试时使用的 <dependency><groupid>com.google.code.gson</groupid><artifactid>gson</artifactid><version>2.2.4</version></dependency></dependencies> |
3.web.xml配置
1 | <!--?xml version="1.0" encoding="UTF-8"?--><web-app xmlns="http://xmlns.jcp.org/xml/ns/javaee" xmlns:xsi="http://www.w3.org/2001/XMLSchema-instance" xsi:schemalocation="http://xmlns.jcp.org/xml/ns/javaee http://xmlns.jcp.org/xml/ns/javaee/web-app_4_0.xsd" version="4.0"><servlet><servlet-name>web</servlet-name><servlet-class>org.springframework.web.servlet.DispatcherServlet</servlet-class><init-param><param-name>contextConfigLocation</param-name><param-value>classpath:springConfig.xml</param-value></init-param><load-on-startup>1</load-on-startup></servlet><servlet-mapping><servlet-name>web</servlet-name><url-pattern>*.mvc</url-pattern></servlet-mapping><filter><filter-name>characterEncodingFilter</filter-name><filter-class>org.springframework.web.filter.CharacterEncodingFilter</filter-class><init-param><param-name>encoding</param-name><param-value>utf-8</param-value></init-param><init-param><param-name>forRequestEncoding</param-name><param-value>true</param-value></init-param><init-param><param-name>forResponseEncoding</param-name><param-value>true</param-value></init-param></filter><filter-mapping><filter-name>characterEncodingFilter</filter-name><url-pattern>/*</url-pattern></filter-mapping></web-app> |
4.springConfig.xml配置
1 2 3 4 5 | <!--?xml version="1.0" encoding="UTF-8"?--><beans xmlns="http://www.springframework.org/schema/beans" xmlns:xsi="http://www.w3.org/2001/XMLSchema-instance" xmlns:context="http://www.springframework.org/schema/context" xmlns:mvc="http://www.springframework.org/schema/mvc" xsi:schemalocation="http://www.springframework.org/schema/beans http://www.springframework.org/schema/mvc https://www.springframework.org/schema/mvc/spring-mvc.xsd"><component-scan base-package="com.file"></component-scan><bean class="org.springframework.web.servlet.view.InternalResourceViewResolver"><property name="prefix" value="/WEB-INF/view/"></property><property name="suffix" value=".jsp"></property></bean><annotation-driven></annotation-driven><bean id="multipartResolver" class="org.springframework.web.multipart.commons.CommonsMultipartResolver"><property name="defaultEncoding" value="utf-8"></property><property name="maxUploadSizePerFile" value="-1"></property><property name="maxUploadSize" value="1048576"></property></bean></beans> |
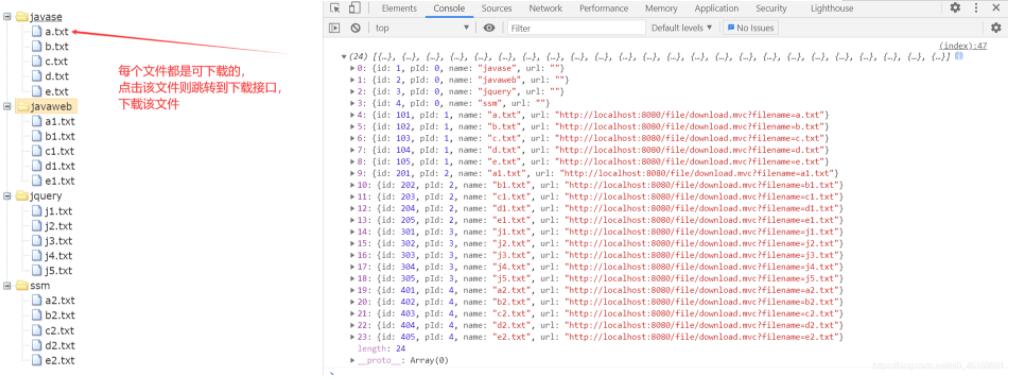
1.效果展示:
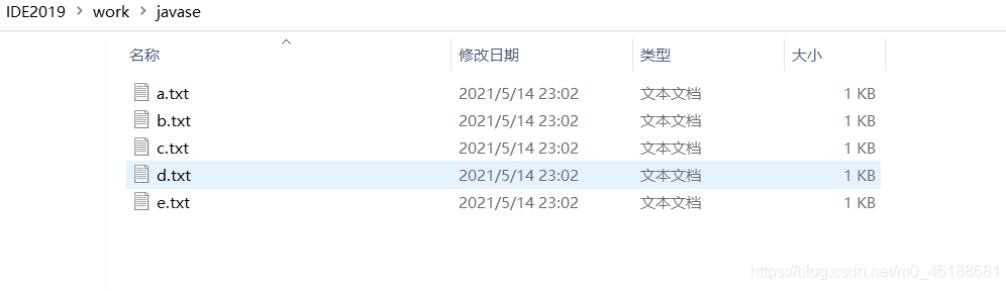
服务器端的文件目录:

2.思路分析
1、需要递归遍历某个目录,并且判断是目录还是文件
2、找到父目录和子文件的关系,构建文件对象,将该对象加入到list集合中
3、将list集合转为json,返回给前端进行渲染
4、前端渲染出来的每个文件都包含一个该文件对应的下载url,点击该文件跳转到该文件的下载接口
5、提供下载接口,前端需要传递一个文件名称,然后后端根据文件名称去遍历指定的目录,查询是否有该文件,如果有,则将该文件进行下载
先来看下如果递归遍历获取到某个目录下的所有文件:
1 2 3 4 5 6 7 8 9 10 11 12 13 14 15 16 | public class Test2 { public static void main(String[] args) { File file = new File("D:\IDE2019"); listFile(file); } public static void listFile(File file ) { // 判断该文件是否存在 if (file.exists()){ // 获取当前文件夹下的所有子文件 File[] files = file.listFiles(); if (files!=null&&files.length>0){ // 对该文件夹进行遍历 for (int i = 0; i |
3.前端实现代码:
代码:
1 2 3 4 5 6 7 8 9 10 11 12 13 14 15 16 17 18 19 20 21 22 23 24 25 26 27 28 29 30 31 32 33 34 35 36 37 38 39 40 41 42 43 | <link rel="stylesheet" href="../../css/zTreeStyle/zTreeStyle.css" type="text/css"><script type="text/javascript" src="../../js/jquery-1.4.4.min.js"></script><script type="text/javascript" src="../../js/jquery.ztree.core.min.js"></script><title>文件下载</title><script> var settingss = { //zTree 的唯一标识,初始化后,等于 用户定义的 zTree 容器的 id 属性值。 treeId:"treeDemo", data: { simpleData: { enable: true, //true 、 false 分别表示 使用 、 不使用 简单数据模式 idKey: "id", //节点数据中保存唯一标识的属性名称 pIdKey: "pId", //节点数据中保存其父节点唯一标识的属性名称 rootPId: "0" //用于修正根节点父节点数据,即 pIdKey 指定的属性值 }, key: { name: "name" //zTree 节点数据保存节点名称的属性名称 默认值:"name" } }, check:{ enable:true, //true 、 false 分别表示 显示 、不显示 复选框或单选框 nocheckInherit:false, //当父节点设置 nocheck = true 时,设置子节点是否自动继承 nocheck = true chkboxType: { "Y": "p", "N": "s" } }, }; $(document).ready(function(){ $.ajax({ type:"get", url:"/file/init.mvc", async:true, success:function(result){ console.log(result) // 得到ajax返回的数据 并且初始化文件树 var zTreeObj = $.fn.zTree.init($("#treeDemo"), settingss, result); //初始化树 zTreeObj.expandAll(false); //true 节点全部展开、false节点收缩 } }); });</script><div> <ul id="treeDemo" class="ztree"></ul></div> |
4.后端代码实现:
1.抽象出来的实例对象bean
1 2 3 4 5 6 7 8 9 10 11 12 13 14 15 16 17 18 19 20 21 22 23 24 25 26 27 28 29 30 31 32 33 34 35 36 37 38 39 40 41 42 43 44 45 46 47 48 49 50 51 52 53 54 55 56 57 58 59 60 61 | /** * @author compass * @version 1.0 * @date 2021-05-14 22:41 */public class MyFile { private int id; private int pId; private String name; private String url; public MyFile(int id, int pId, String name, String url) { this.id = id; this.pId = pId; this.name = name; this.url = url; } @Override public String toString() { return "MyFile{" + "id=" + id + ", pId=" + pId + ", name='" + name + ''' + ", url='" + url + ''' + '}'; } public int getId() { return id; } public void setId(int id) { this.id = id; } public int getpId() { return pId; } public void setpId(int pId) { this.pId = pId; } public String getName() { return name; } public void setName(String name) { this.name = name; } public String getUrl() { return url; } public void setUrl(String url) { this.url = url; }} |
2.渲染数据和指定文件名查询文件地址的类
1 2 3 4 5 6 7 8 9 10 11 12 13 14 15 16 17 18 19 20 21 22 23 24 25 | /** * @author compass * @version 1.0 * @date 2021-05-15 12:31 */public class FilerService { // 将构建为文件对象的文件或目录放到list集合中 List<myfile> fileList = new ArrayList(); /** * 功能:递归遍历文件,并且将文件或目录按照规定构建为对象 撞到List集合返回 * @param file 待遍历的文件夹 * @param index 扫描文件赋值指针 初始值为 :1 * @return */ public List<myfile> listAll1(File file , int index) { File[] listFiles= file.listFiles(); // 将文件或目录构建为对象 for (int i=1;i<listfiles.length if="" pid="0说明是根目录" myfile="" filelist.add="" string="" filename="listFiles[i-1].getName();" file="" files="file.listFiles();">0){ // 对文件进行遍历 for (int i = 0; i 0){ for (int i=0;i<files.length if="" getfilename="" parentdir="" break="" return=""></files.length></listfiles.length></myfile></myfile> |
3.下载和渲染数据的Controller
1 2 3 4 5 6 7 8 9 10 11 12 13 14 15 16 17 18 19 20 21 22 23 24 25 26 27 28 29 30 31 32 33 34 35 36 37 38 39 40 41 42 43 44 45 46 47 | /** * @author compass * @version 1.0 * @date 2021-05-14 21:43 */@Controller@RequestMapping("/file/")public class FileDownloadController { // 提供访问接口 @GetMapping("downloadIn.mvc") public String downloadIn(){ return "index"; } // 初始化页面数据 @ResponseBody @GetMapping("init.mvc") public List<myfile> test(){ File file = new File("D:\IDE2019\work"); FilerService service = new FilerService(); // 将制定目录的文件夹 下的目录和文件构建为MyFile对象装到List集合中 List<myfile> listAll1 = service.listAll1(file, 1); // 返回Json数据给前端进行渲染 return listAll1; } // 提供下载接口 @GetMapping("download.mvc") public ResponseEntity <byte> fileDownload1(String filename,HttpServletRequest request) throws IOException { // 指定下载那个目录下的文件 File file = new File("D:\IDE2019\work"); FilerService service = new FilerService(); // 获取到该文件的父目录 String path = service.getFileName(filename, file); // 创建文件下载对象 File downloadFile = new File(path, filename); HttpHeaders header = new HttpHeaders(); header.setContentDispositionFormData("attachment",filename); header.setContentType(MediaType.APPLICATION_OCTET_STREAM); ResponseEntity<byte> result = new ResponseEntity(FileUtils.readFileToByteArray(downloadFile), header, HttpStatus.OK); return result; }}</byte></byte></myfile></myfile> |
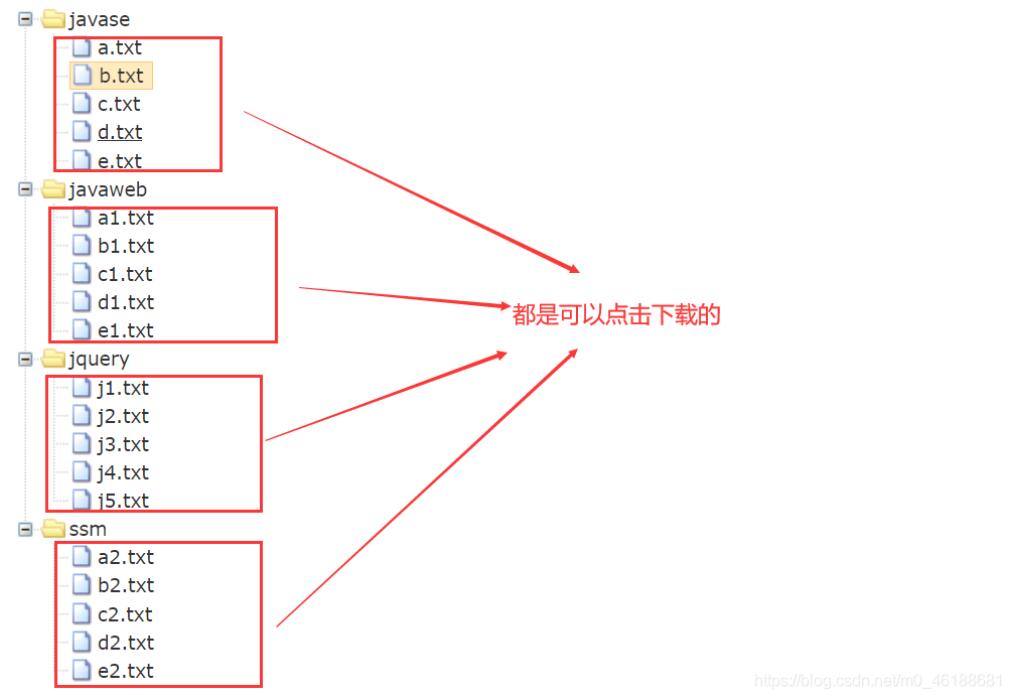
测试:可以看到我们每点击一个文件都可以跳转到我们的下载接口,进行下载的。

这只是一个简单的使用,还有很多地方需要进行优化,当然也可以使用别的方法进行实现,这就是算是一个小练习吧,复习一下ajax和递归的知识。
以上就是本文的全部内容,希望对大家的学习有所帮助,也希望大家多多支持IT俱乐部。

