
一、上传到OSS或者服务器
缺点:
1.大文件上传时间过长
2.如果用户只是预览则会浪费服务端存储
二、使用FileReader对象转换File对象为base64
1 2 3 4 5 6 7 8 9 10 11 12 13 14 15 16 17 18 19 20 21 22 | <video src="" id="video" controls="controls" data-origwidth="0" data-origheight="0" style="width: 1264px;"> const videoInput = document.getElementById('videoInput'); videoInput.addEventListener('change', e => { previewByReader(e.target.files[0]) })function fileToBase64(file: File): Promise { const fileReader = new FileReader() fileReader.readAsDataURL(file) var filename = file.name; return new Promise((resolve, reject) => { fileReader.addEventListener("loadend", (e: ProgressEvent) => { var url: any = e.target!.result; resolve({ url, filename }) }, false); })} async function previewByReader (file) { const {url} = await fileToBase64(file) video.src = url }</video> |
三、通过blob协议实现预览
1 2 3 4 5 6 7 8 9 | <video src="" id="video" controls="controls" width="400" height="200" data-origwidth="400" data-origheight="200" style="width: 1264px; height: 632px;"> const videoInput = document.getElementById('videoInput'); videoInput.addEventListener('change', e => { previewByURL(e.target.files[0]) }) function previewByURL (file) { video.src = URL.createObjectURL(file) } </video> |
附:前端自定义封装图片预览组件(支持多张图片预览 缩放)
封装图片预览组件:
1 2 3 4 5 6 7 8 9 10 11 12 13 14 15 16 17 18 19 20 21 22 23 24 25 26 27 28 29 30 31 32 33 34 35 36 37 38 39 40 41 42 43 44 45 46 47 48 49 50 51 52 53 54 55 56 57 58 59 60 61 62 63 64 65 66 67 68 69 70 71 72 73 74 75 76 77 78 79 80 81 82 83 84 85 86 87 88 89 90 91 92 93 94 95 96 97 98 99 100 101 102 103 104 105 106 107 108 109 110 111 112 113 114 115 116 117 118 119 120 121 122 123 124 | <div class="image-preview"> <div class="overlay"></div> <div class="preview-container"> <img alt="Preview Image"></div> <div class="arrow arrow-left"><</div> <div class="arrow arrow-right">></div> </div> export default { props: { images: { type: Array, required: true, }, }, data() { return { showOverlay: false, currentIndex: 0, currentImageUrl: '', scale: 1, initialMouseX: 0, initialScale: 1, isDragging: false, }; }, methods: { openPreview() { this.showOverlay = true; this.currentImageUrl = this.images[this.currentIndex]; this.$refs.previewWrapper.style.display = 'flex'; setTimeout(() => { this.$refs.previewWrapper.style.opacity = 1; }, 10); }, closePreview() { this.showOverlay = false; setTimeout(() => { this.$refs.previewWrapper.style.opacity = 0; setTimeout(() => { this.$refs.previewWrapper.style.display = 'none'; }, 0); }, 0); }, nextImage() { this.currentIndex = (this.currentIndex + 1) % this.images.length; this.currentImageUrl = this.images[this.currentIndex]; }, prevImage() { this.currentIndex = (this.currentIndex - 1 + this.images.length) % this.images.length; this.currentImageUrl = this.images[this.currentIndex]; }, imageLoaded() { // 可以在此处调整图片的居中或其它布局逻辑 }, }, mounted() { // 初始化时隐藏预览层 this.$refs.previewWrapper.style.display = 'none'; }, }; .image-preview { position: fixed; top: 0; left: 0; right: 0; bottom: 0; z-index: 999; display: none; justify-content: center; align-items: center; opacity: 0; transition: opacity 0.7s ease-in-out; } .overlay { position: absolute; top: 0; left: 0; width: 100%; height: 100%; background-color: rgba(0, 0, 0, 0.8); cursor: pointer; } .preview-container { position: relative; text-align: center; overflow: hidden; max-width: 90%; max-height: 90vh; } .arrow { width: 50px; height: 50px; position: absolute; top: 50%; transform: translateY(-50%); background: rgba(255, 255, 255, 0.8); padding: 10px; border-radius: 50%; cursor: pointer; z-index: 1; opacity: 0.5; transition: opacity 0.3s; border: none; font-size: 20px; line-height: 50px; } .arrow:hover { opacity: 1; } .arrow-left { left: 10px; } .arrow-right { right: 10px; } |
图片放大缩小依靠自定义指令实现:
自定义指定代码:src/utils/scale.js
1 2 3 4 5 6 7 8 9 10 11 12 13 14 15 16 17 18 19 20 21 22 23 24 25 26 27 28 29 30 31 32 33 34 35 36 37 38 39 40 41 42 43 44 45 46 47 48 49 50 51 52 53 54 55 56 57 58 59 60 61 62 63 64 65 66 67 68 69 70 71 72 73 74 | export const initVWheelScale = (Vue) => { Vue.directive("wheelScale", (el, binding) => { const { maxScale = 5, minScale = 0.5, initScale = 1, cssVarName = "--scale", } = binding.arg || {} let currentScale = initScale || el.style.getPropertyValue(cssVarName) || 1 setWheelScale(binding, { el, cssVarName, currentScale, minScale, maxScale, }) if (el) { el.onwheel = (e) => { currentScale = el.style.getPropertyValue(cssVarName) || 1 if (e.wheelDelta > 0) { currentScale = currentScale * 1 + 0.1 } else { currentScale = currentScale * 1 - 0.1 } setWheelScale(binding, { el, cssVarName, currentScale, minScale, maxScale, }) } } }) } // 设置 --scale 变量 缩放比例 const setVarScale = (el, cssVarName, currentScale, minScale, maxScale) => { // 现在缩放范围 if (currentScale > maxScale) { currentScale = maxScale } else if (currentScale { let transformCssString = el.style.transform let regScaleGlobal = /scale(.*?[ )]*[)]+[ ]*/g //匹配 Scale属性 全局 if (regScaleGlobal.test(transformCssString)) { transformCssString = transformCssString.replace( regScaleGlobal, ` scale(var(${cssVarName})) ` ) } else { transformCssString += " " + `scale(var(${cssVarName}))` } el.style.transform = transformCssString } export const setWheelScale = (binding = {}, options) => { const { el, cssVarName, currentScale, minScale, maxScale } = options const nowScale = setVarScale(el, cssVarName, currentScale, minScale, maxScale) setTransformCss(el, cssVarName) // 缩放改变回调函数 const wheelScaleHandle = binding.value || null if (wheelScaleHandle instanceof Function) { wheelScaleHandle({ el, cssVarName, maxScale, minScale, currentScale: nowScale, setScale: (_scale) => { setWheelScale(binding, { ...options, currentScale: _scale }) }, binding, }) } } |
main.js中全局注册自定义指令:
1 2 | import { initVWheelScale} from "@/utils/scale.js"initVWheelScale(Vue) |
在图片预览组件中使用:
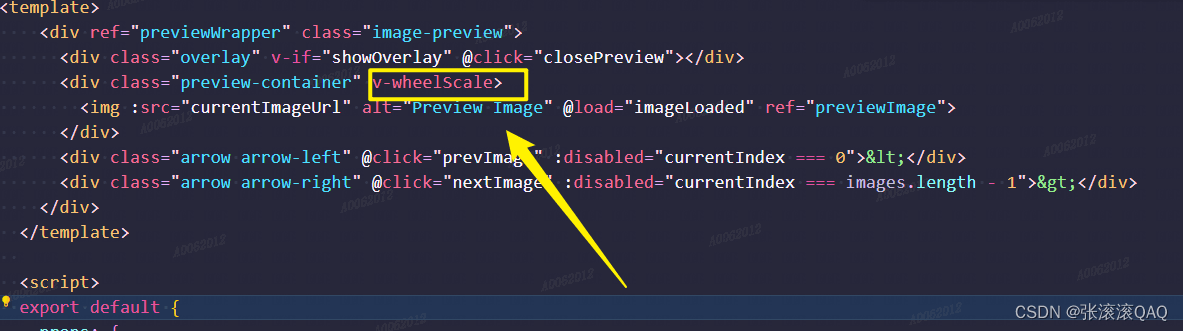
组件的使用:
1 2 3 4 5 6 7 8 9 10 11 12 13 14 15 16 17 18 19 20 21 22 23 24 25 26 27 | <div> <button>预览图片</button> </div>import ImagePreview from '@/components/ImagePreview.vue'; // 引入你的图片预览组件export default { components: { ImagePreview, }, data() { return { imageList: [ 'https://img1.baidu.com/it/u=582697934,2565184993&fm=253&fmt=auto&app=120&f=JPEG?w=500&h=539', 'https://img2.baidu.com/it/u=3519181745,2349627299&fm=253&fmt=auto&app=120&f=JPEG?w=750&h=500', // 更多图片路径 ], }; }, methods: { openPreview() { this.$refs.imagePreview.openPreview(); }, },}; |
效果:

总结
到此这篇关于前端实现图片或视频预览的三种方法的文章就介绍到这了,更多相关前端图片或视频预览内容请搜索IT俱乐部以前的文章或继续浏览下面的相关文章希望大家以后多多支持IT俱乐部!

