除了核心功能默认内置的指令,Vue.js允许注册自定义指令。添加一个自定义指令,有两种方式:
(1)通过Vue.directive()函数注册一个全局的指令
(2)通过组件directives属性,对该组件添加一个局部的指令
一、自定义指令v-mycolor
示例:
1 2 3 4 5 6 7 8 9 10 11 12 13 14 15 16 17 18 19 | <div id="root"> <div id="demo"> {{hello}} </div></div> Vue.config.productionTip = false; Vue.directive('mycolor', function(el, binding, vnode) { el.style = 'color:' + binding.value; }); const vm = new Vue({ el: '#root', data: { hello:"你好", color:'red' }, methods: { } }) |
执行结果:

通过以上示例,可以看到网页上的”你好”是红色,说明自定义指令起到了作用。
在自定义指令中,可以传递是三个参数:
el:指令所绑定的元素,可以用来直接操作DOM。
binding:一个对象,包含指令的很多信息。
vnode:Vue.js编译生成的虚拟节点。
自定义指令生命周期:
(1)bind:只调用一次,指令第一次绑定到元素时调用,用这个钩子函数可以定义一个绑定时执行一次的初始化动作
(2)nserted:被绑定元素插入父节点时调用(父节点存在即可调用,不必存在与document中)。
(3)update:被绑定于元素所在的模板更新时调用,而无论绑定至是否变化。通过比较更新前后的绑定值,可以忽略不必要的模板更新。
(4)componentUpdated:被绑定元素所在模板完成一次更新周期时调用。
(5)unbind:只调用一次,指令与元素解绑时调用
二、使用钩子函数的自定义指令
钩子函数的参数如下所示:
el:与上面介绍的一样,el是指令所绑定的元素,可以用来直接操作DOM;
示例:
1 2 3 4 5 6 7 8 9 10 11 12 13 14 15 16 17 18 19 20 21 22 23 24 25 26 27 28 29 30 31 32 33 34 35 36 37 38 39 40 | <div id="root"> <div id="demo"> {{num}} </div> <div> <button>Add</button> </div></div> Vue.config.productionTip = false; Vue.directive('mycolor',{ bind:function(){ console.log('1-绑定时调用bind'); }, inserted:function(el,binding,vnode){ alert('绑定到节点时调用inserted'); console.log('2-绑定到节点时调用inserted'); el.style='color:'+binding.value; }, update:function(el,binding,vnode){ alert('3-组件更新时调用update'); console.log('3-组件更新时调用update'); el.style='color:green'; }, componentUpdated:function(){ console.log('4-组件更新完成时调用componentUpdated'); } }) const vm = new Vue({ el: '#root', data: { num:10, color:'red' }, methods: { add:function(){ this.num++; } } }) |
执行结果:
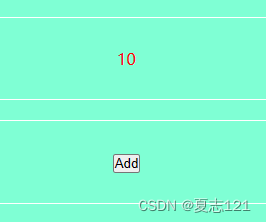
运行后,浏览器会弹出”绑定到节点时调用inserted”,这时文字的颜色会变成红色,且浏览器的控制中输出:


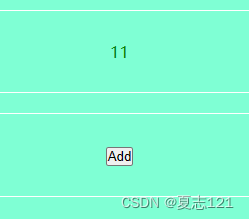
当点击”Add”按钮时,浏览器会弹出”3-组件更新时调用update”,这时文字会由”10″变成11,字体颜色会变成绿色:


三、Vue实现简单的学生信息管理系统
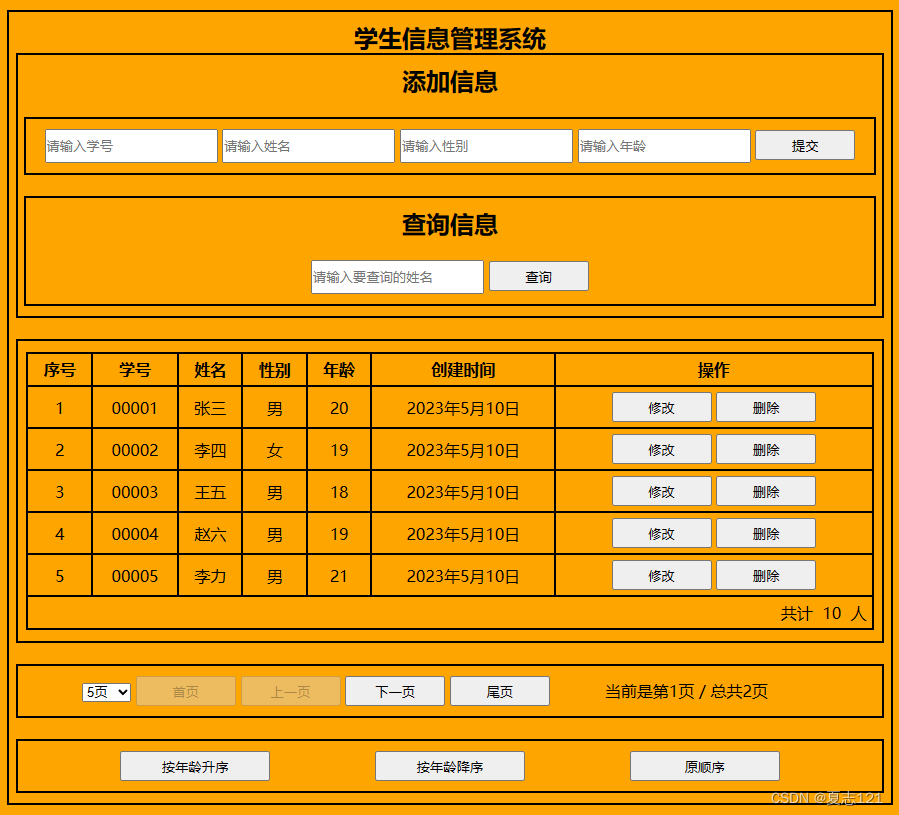
实现学生信息的增删改查和分页功能,及按照学生年龄进行降序排序,升序排序和原顺序
全部源代码:
1 2 3 4 5 6 7 8 9 10 11 12 13 14 15 16 17 18 19 20 21 22 23 24 25 26 27 28 29 30 31 32 33 34 35 36 37 38 39 40 41 42 43 44 45 46 47 48 49 50 51 52 53 54 55 56 57 58 59 60 61 62 63 64 65 66 67 68 69 70 71 72 73 74 75 76 77 78 79 80 81 82 83 84 85 86 87 88 89 90 91 92 93 94 95 96 97 98 99 100 101 102 103 104 105 106 107 108 109 110 111 112 113 114 115 116 117 118 119 120 121 122 123 124 125 126 127 128 129 130 131 132 133 134 135 136 137 138 139 140 141 142 143 144 145 146 147 148 149 150 151 152 153 154 155 156 157 158 159 160 161 162 163 164 165 166 167 168 169 170 171 172 173 174 175 176 177 178 179 180 181 182 183 184 185 186 187 188 189 190 191 192 193 194 195 196 197 198 199 200 201 202 203 204 205 206 207 208 209 210 211 212 213 214 215 216 217 218 219 220 221 222 223 224 225 226 227 228 229 230 231 232 233 234 235 236 237 238 239 240 241 242 243 244 245 246 247 248 249 250 251 252 253 254 255 256 257 258 259 260 261 262 263 264 265 266 267 268 269 270 271 272 273 274 275 276 277 278 279 280 281 282 283 284 285 286 287 | <title>Document</title> * { margin: 0px; padding: 0px; } #root { margin: 0px auto; width: 900px; height: auto; background-color: orange; } div { margin: 0px auto; border: 2px solid black; width: 98%; text-align: center; padding-top: 10px; padding-bottom: 10px; } table { width: 98%; margin: 1px auto; border: 2px solid black; border-collapse: collapse; } th, td { border: 2px solid black; padding: 5px; } label { margin-left: 10px; } input { height: 30px; } button { width: 100px; height: 30px; } span { margin-left: 50px; margin-right: 50px; } <div id="root"> <div> <h2>学生信息管理系统</h2> <div> <h2>添加信息</h2><br><div> <button>提交</button> </div><br><div> <h2>查询信息</h2><br><button>查询</button> </div> </div><br><div> <table><tbody><tr><th>序号</th> <th>学号</th> <th>姓名</th> <th>性别</th> <th>年龄</th> <th>创建时间</th> <th>操作</th> </tr><tr><td>{{index+1}}</td> <td>{{student.id}}</td> <td>{{student.name}}</td> <td>{{student.sex}}</td> <td>{{student.age}}</td> <td>{{student.ctime | newTime}}</td> <td> <button>修改</button> <button>删除</button> </td> </tr><tr><td align="right" colspan="7">共计 {{count}} 人</td> </tr></tbody></table></div><br><div> 5页10页15页20页<button>首页</button> <button>上一页</button> <button>下一页</button> <button>尾页</button> <span>当前是第{{ currentPage }}页 / 总共{{ totalPages }}页</span> </div> <br><div> <h2>修改信息</h2> <br><br><label>学号:</label> <label>姓名:</label> <br><br><label>性别:</label> <label>年龄:</label> <br><br><button>保存</button> </div> <div> <span><button style="width: 150px">按年龄升序</button></span> <span><button style="width: 150px">按年龄降序</button></span> <span><button style="width: 150px">原顺序</button></span> </div> </div> </div> Vue.config.productionTip = false; Vue.filter("newTime", (value) => { year = value.getFullYear(); month = value.getMonth() + 1; day = value.getDate(); return `${year}年${month}月${day}日`; // return year + "年" + month + "月" + day + "日" }) const vm = new Vue({ el: '#root', data: { flag: false,//true表示修改窗口展开,false表示窗口关闭 id: "", name: "", sex: "", age: "", id2: "", name2: "", sex2: "", age2: "", keyword: "", time: "", sortType: 0,//0表示原顺序,1表示降序,2表示升序 editIndex: null, // 保存正在编辑的对象的索引,初始值不能为0及0以上的数 students: [ { id: "00001", name: "张三", sex: "男", age: 20, ctime: new Date() }, { id: "00002", name: "李四", sex: "女", age: 19, ctime: new Date() }, { id: "00003", name: "王五", sex: "男", age: 18, ctime: new Date() }, { id: "00004", name: "赵六", sex: "男", age: 19, ctime: new Date() }, { id: "00005", name: "李力", sex: "男", age: 21, ctime: new Date() }, { id: "00006", name: "二狗", sex: "男", age: 17, ctime: new Date() }, { id: "00007", name: "狗蛋", sex: "女", age: 20, ctime: new Date() }, { id: "00008", name: "三炮", sex: "男", age: 19, ctime: new Date() }, { id: "00009", name: "刘仁", sex: "女", age: 19, ctime: new Date() }, { id: "00010", name: "四儿", sex: "男", age: 22, ctime: new Date() } ], newStudents: [], currentPage: 1,//当前页数,默认为1 pageSize: 5,//每页显示数量 }, computed: { //计算有几组学生信息 count() { return this.fillPersons.length; }, dataShow() { let start = (this.currentPage - 1) * this.pageSize; let end = Math.min((this.currentPage) * this.pageSize, this.count); return this.fillPersons.slice(start, end); }, //计算总页数 totalPages() { return Math.ceil(this.count / this.pageSize) || 1; }, //对学生信息进行排序 fillPersons() { // 找到第一个满足条件的元素就终止过滤操作 const arr = this.students.filter((p) => { return p.name.indexOf(this.keyword) !== -1; }); //对学生信息进行升序降序和原顺序排序 if (this.sortType) { arr.sort((p1, p2) => { return this.sortType === 1 ? p2.age - p1.age : p1.age - p2.age; }); } return arr; } }, methods: { //更改每页显示的记录数时更新当前页码,以确保在更改每页记录数后, // 用户仍然可以看到正确的记录列表。 changePageSize() { this.currentPage = 1; }, //首页 firstPage() { this.currentPage = 1; }, //上一页 previousPage() { this.currentPage -= 1; }, //下一页 nextPage() { this.currentPage += 1; }, //尾页 lastPage() { this.currentPage = this.totalPages; }, //添加操作 add() { //添加进对应的学生信息 this.students.push({ id: this.id, name: this.name, sex: this.sex, age: this.age, ctime: new Date() }); //重新赋空值 this.id = "", this.name = "", this.sex = "", this.age = "" }, //删除操作 del(index) { //根据下标删除对应的学生信息 this.students.splice(index, 1); }, //查询操作 search() { //判断是否输入查询内容 if (this.keyword) { // this.students = this.newStudents; //找到满足条件的元素并赋值 var list = this.students.filter(item => item.name.indexOf(this.keyword) > -1); if (list.length != 0) { alert("查询成功"); this.students = list; } else { alert("查询失败"); this.students = []; } this.keyword = '' } else { alert("请输入要查找的姓名"); } }, // 修改操作 toEdit(id) { //定位索引 this.editIndex = id; // flag 调成 true,调出修改操作窗口 this.flag = true; // filter 操作:找到第一个满足条件的元素就终止过滤操作 let student = this.students.filter(stu => { // 注意:此时的返回值 student 是一个对象 return stu.id == id; }); // 此时在文本框中显示的是:已经选中的学生信息 this.id2 = student[0].id; this.name2 = student[0].name; this.sex2 = student[0].sex; this.age2 = student[0].age; }, // 修改保存操作 add2(editIndex) { // flag 调成 false,就表示是关闭修改操作窗口 this.flag = false; //查找需要修改的的下标 var index = this.students.findIndex((item) => { if (item.id == this.editIndex) { return true; } }) //删除对应下标的学生信息 this.students.splice(index, 1); // //把最最新的学生信息重新添加 this.students.push({ id: this.id2, name: this.name2, sex: this.sex2, age: this.age2, ctime: new Date() }); // //重新赋空值 this.id2 = "", this.name2 = "", this.sex2 = "", this.age2 = "" }, } }) |
执行结果:

上图只展示了主界面,其他功能请自行复制粘贴到vscode中执行修改!
到此这篇关于Vue自定义指令学习及应用详解的文章就介绍到这了,更多相关Vue自定义指令内容请搜索IT俱乐部以前的文章或继续浏览下面的相关文章希望大家以后多多支持IT俱乐部!

