
前言
在开局配置Nginx时有可能会配置错误,报各种错误代码。看不懂或者懒得去看这个报错时,其实最简单的方式是卸载并重装咯。今天就带大家一起学习下,如何彻底卸载nginx程序。
一、卸载NGINX
卸载nginx程序的详细步骤
1、停止Nginx软件
/usr/local/nginx/sbin/nginx -s stop
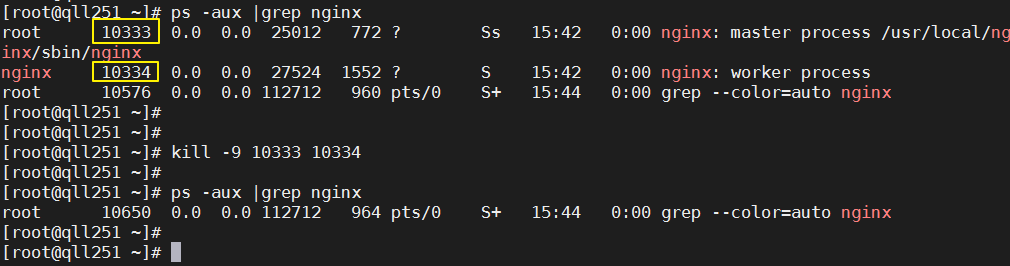
如果不知道nginx安装路径,可以通过执行ps命令找到nginx程序的PID,然后kill其PID
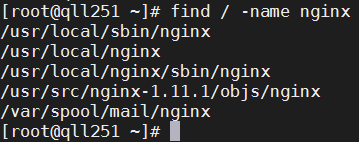
2、查找根下所有名字包含nginx的文件
find / -name nginx
3、执行命令 rm -rf *删除nignx安装的相关文件
说明:全局查找往往会查出很多相关文件,但是前缀基本都是相同,后面不同的部分可以用*代替,以便快速删除~
1 2 3 4 | [root@qll251 ~]# rm -rf /usr/local/sbin/nginx[root@qll251 ~]# rm -rf /usr/local/nginx[root@qll251 ~]# rm -rf /usr/src/nginx-1.11.1[root@qll251 ~]# rm -rf /var/spool/mail/nginx |
4、其他设置
如果设置了Nginx开机自启动的话,可能还需要下面两步
chkconfig nginx offrm -rf /etc/init.d/nginx
删除之后,便可重新安装nginx了
二、开始安装NGINX
a、安装所需插件
1、安装gcc
gcc是linux下的编译器在此不多做解释,感兴趣的小伙伴可以去查一下相关资料,它可以编译 C,C++,Ada,Object C和Java等语言
命令:查看gcc版本
gcc -v
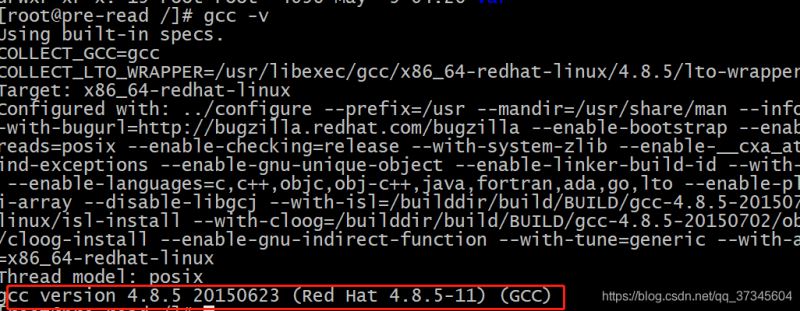
一般阿里云的centOS7里面是都有的,没有安装的话会提示命令找不到,
安装命令:
1 | yum -y install gcc |
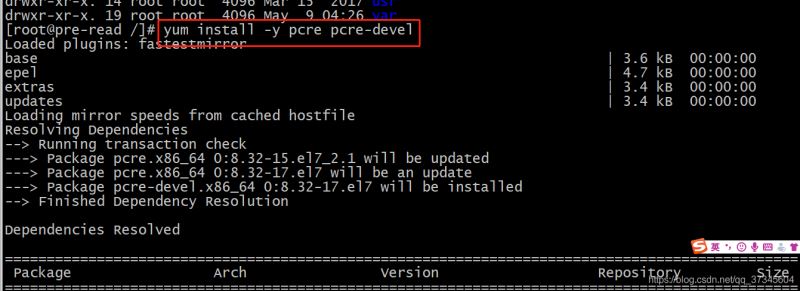
2、pcre、pcre-devel安装
pcre是一个perl库,包括perl兼容的正则表达式库,nginx的http模块使用pcre来解析正则表达式,所以需要安装pcre库。
安装命令:
1 | yum install -y pcre pcre-devel |
3、zlib安装
zlib库提供了很多种压缩和解压缩方式nginx使用zlib对http包的内容进行gzip,所以需要安装
安装命令:
1 | yum install -y zlib zlib-devel |
4、安装openssl
openssl是web安全通信的基石,没有openssl,可以说我们的信息都是在裸奔。。。。。。
安装命令:
1 | yum install -y openssl openssl-devel |
b、安装nginx
1、下载nginx安装包
1 | wget http://nginx.org/download/nginx-1.9.9.tar.gz |
2、把压缩包解压到usr/local/java
1 | tar -zxvf nginx-1.9.9.tar.gz |
3、切换到cd /usr/local/java/nginx-1.9.9/下面
执行三个命令:
1 2 3 4 5 | ./configure --prefix=/usr/local/nginx --with-http_stub_status_module --with-http_ssl_module make make install |
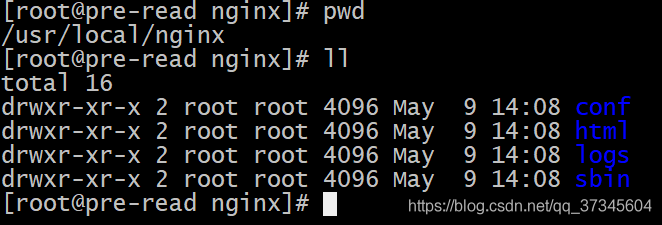
4、切换到/usr/local/nginx安装目录
5、配置nginx的配置文件nginx.conf文件,主要也就是端口
1 2 3 4 5 6 7 8 9 10 11 12 13 14 15 16 17 18 19 20 21 22 23 24 25 26 27 28 29 30 31 32 33 34 35 36 37 38 39 40 41 42 43 44 45 46 47 48 49 50 51 52 53 54 55 56 57 58 59 60 61 62 63 64 65 66 67 68 69 70 71 72 73 74 75 76 77 78 79 80 81 82 83 84 85 86 87 88 89 90 91 92 93 94 95 96 97 98 99 100 101 102 103 104 105 106 107 108 109 110 111 112 113 114 115 116 117 118 119 120 121 122 123 124 125 126 127 128 129 130 131 132 133 134 135 136 137 138 139 140 141 142 143 144 145 146 147 148 149 150 151 152 153 154 155 156 157 158 159 160 161 162 163 164 165 166 167 168 169 170 171 172 173 174 175 176 177 178 179 180 181 182 183 184 185 186 187 188 189 190 191 192 193 194 195 196 197 198 199 200 201 202 203 | #user nobody;worker_processes 4;worker_rlimit_nofile 65535; #error_log logs/error.log;#error_log logs/error.log notice;#error_log logs/error.log info; #pid logs/nginx.pid; events { worker_connections 65535; #use epoll; #accept_mutex off; #multi_accept off;} http { include mime.types; default_type application/octet-stream; #log_format main '$remote_addr - $remote_user [$time_local] "$request" ' # '$status $body_bytes_sent "$http_referer" ' # '"$http_user_agent" "$http_x_forwarded_for"'; #access_log logs/access.log main; sendfile on; #tcp_nopush on; #tcp_nodelay on; #keepalive_timeout 0; keepalive_timeout 65; #send_timeout 10s; #types_hash_max_size 2048; #client_header_buffer_size 4k; #client_max_body_size 8m; proxy_connect_timeout 300; proxy_send_timeout 300; proxy_read_timeout 300; proxy_buffer_size 64k; proxy_buffers 4 64k; proxy_busy_buffers_size 128k; proxy_temp_file_write_size 128k; #gzip on; upstream test123456 { ip_hash; server 192.168.0.192:8081; server 192.168.0.144:8081; server 192.168.0.203:8081; } upstream testjk123456 { #ip_hash; server 192.168.0.192:8081; server 192.168.0.144:8081; server 192.168.0.203:8081; } # another virtual host using mix of IP-, name-, and port-based configuration # #server { # listen 8000; # listen somename:8080; # server_name somename alias another.alias; # location / { # root html; # index index.html index.htm; # } #} # HTTPS server # #server { # listen 443 ssl; # server_name localhost; # ssl_certificate cert.pem; # ssl_certificate_key cert.key; # ssl_session_cache shared:SSL:1m; # ssl_session_timeout 5m; # ssl_ciphers HIGH:!aNULL:!MD5; # ssl_prefer_server_ciphers on; # location / { # root html; # index index.html index.htm; # } #} server { listen 443 ssl; server_name test.jjtech.cn; ssl_certificate /usr/local/java/ng.crt; ssl_certificate_key /usr/local/java//ng.key; ssl_session_cache shared:SSL:1m; ssl_session_timeout 5m; #ssl_ciphers HIGH:!aNULL:!MD5; ssl_prefer_server_ciphers on; ssl_protocols TLSv1 TLSv1.1 TLSv1.2; ssl_ciphers ECDH+AESGCM:ECDH+AES256:ECDH+AES128:ECDH+3DES:RSA+AESGCM:RSA+AES:RSA+3DES:!aNULL:!eNULL:!MD5:!DSS:!EXP:!ADH:!LOW:!MEDIUM; proxy_ssl_server_name on; #charset koi8-r; charset utf-8; #access_log logs/host.access.log main; #rewrite ^(.*)$ https://${server_name}$1 permanent; location /h5 { root /usr/local/java; index index.html index.htm; } location ~ ^/h5.*.(css|jpeg|jpg|gif|js)$ { root /usr/local/java; } location /bz { proxy_pass http://test123456/; proxy_send_timeout 18000; proxy_read_timeout 18000; proxy_connect_timeout 18000; proxy_set_header Upgrade $http_upgrade; proxy_set_header Connection "upgrade"; } location /api { proxy_pass http://testjk123456/; proxy_send_timeout 18000; proxy_read_timeout 18000; proxy_connect_timeout 18000; proxy_set_header Upgrade $http_upgrade; proxy_set_header Connection "upgrade"; } location / { proxy_pass http://test123456/$request_uri; proxy_set_header Upgrade $http_upgrade; proxy_set_header Connection "upgrade"; } location /apilogin { proxy_pass http://test123456/$request_uri; proxy_set_header Upgrade $http_upgrade; proxy_set_header Connection "upgrade"; } #error_page 404 /404.html; # redirect server error pages to the static page /50x.html # error_page 500 502 503 504 /50x.html; location = /50x.html { root html; } # proxy the PHP scripts to Apache listening on 127.0.0.1:80 # #location ~ .php$ { # proxy_pass http://127.0.0.1; #} # pass the PHP scripts to FastCGI server listening on 127.0.0.1:9000 # #location ~ .php$ { # root html; # fastcgi_pass 127.0.0.1:9000; # fastcgi_index index.php; # fastcgi_param SCRIPT_FILENAME /scripts$fastcgi_script_name; # include fastcgi_params; #} # deny access to .htaccess files, if Apache's document root # concurs with nginx's one # #location ~ /.ht { # deny all; #} } } |
可以按照自己服务器的端口使用情况来进行配置
ESC键,wq!强制保存并退出
6、启动nginx服务
切换目录到/usr/local/nginx/sbin下面
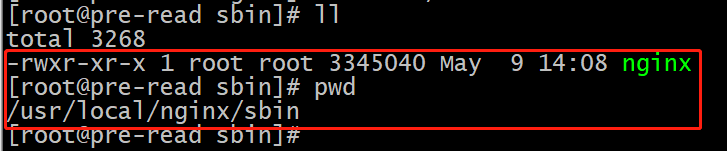
启动nginx命令:
1 | ./nginx |
8、访问你的服务器IP
显示
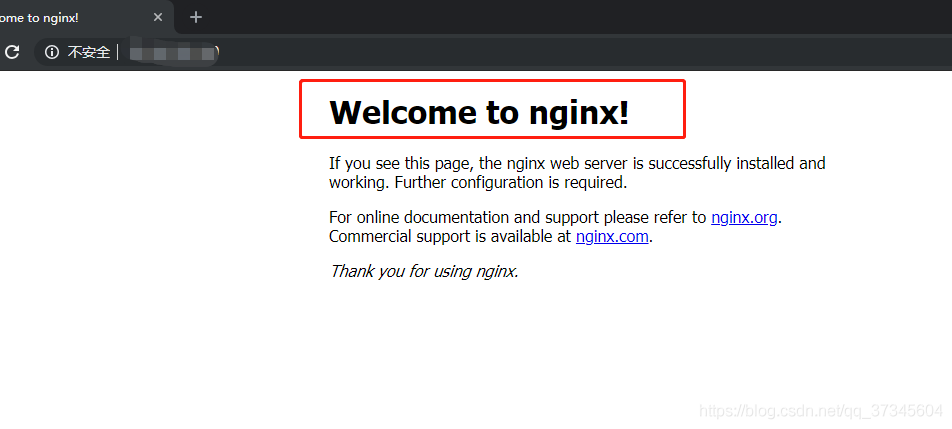
说明安装和配置都没问题OK了
9、nginx常用命令
1.启动nginx命点:./nginx
2.重启nginx命令:./nginx -s reload
3. 停止 nginx 命令: ./nginx -s stop 或 ./nginx -s quit
4. 关闭nginx进程:
ps -ef|grep nginx
命令 kill -9 8725 (进程号 上面的) 则关闭nginx
总结
到此这篇关于完全卸载nginx以及安装的文章就介绍到这了,更多相关完全卸载及安装nginx内容请搜索IT俱乐部以前的文章或继续浏览下面的相关文章希望大家以后多多支持IT俱乐部!

